
Appearance
Construction Projects
A construction project is the job you build: a villa compound, a tower, an office fit-out. It is the centre of everything else: the team, the contract, the budget, the schedule, the site reports, the documents and the invoices are all linked to a project. This chapter explains how to create a project and what each part of the project form is for.
WHO DOES THIS
Projects are created by users with the Construction: Project Manager level or higher. Team members only see the projects of which they are a team member (see Project Teams).
The project list
Open . Each card is a project, with its client and project manager. Click a card to open the project.
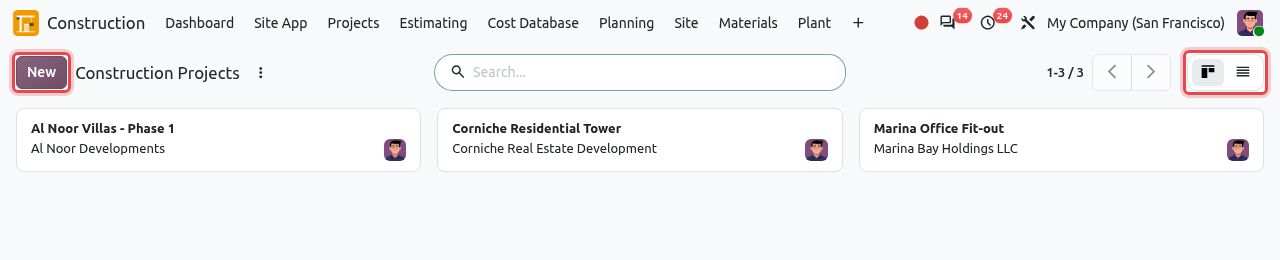
The construction projects. The New button and the view switcher (cards / list) are framed. Click the list icon at the top right to see the projects as a list, with their Project Code, client, company, project manager, Our Role and Phase.
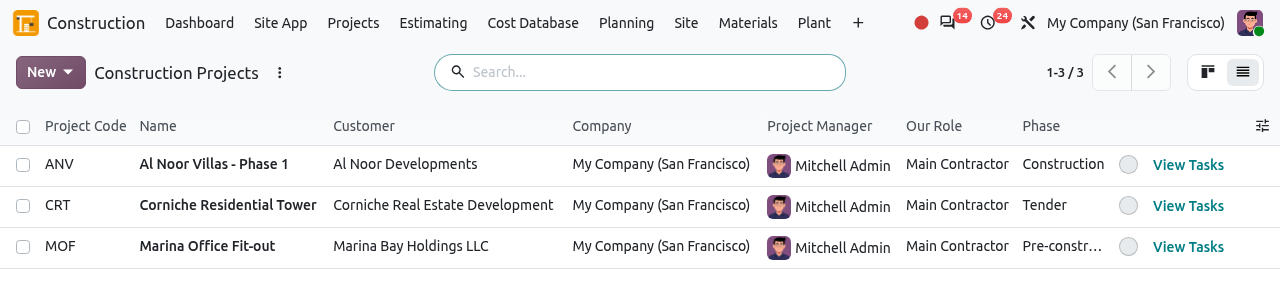
The list view. To find projects, use the search bar: type a project name or code. Open the search options (arrow at the right of the search bar) to use the filter My Construction Projects (projects you manage or belong to), or to group the projects by Our Role or Phase.
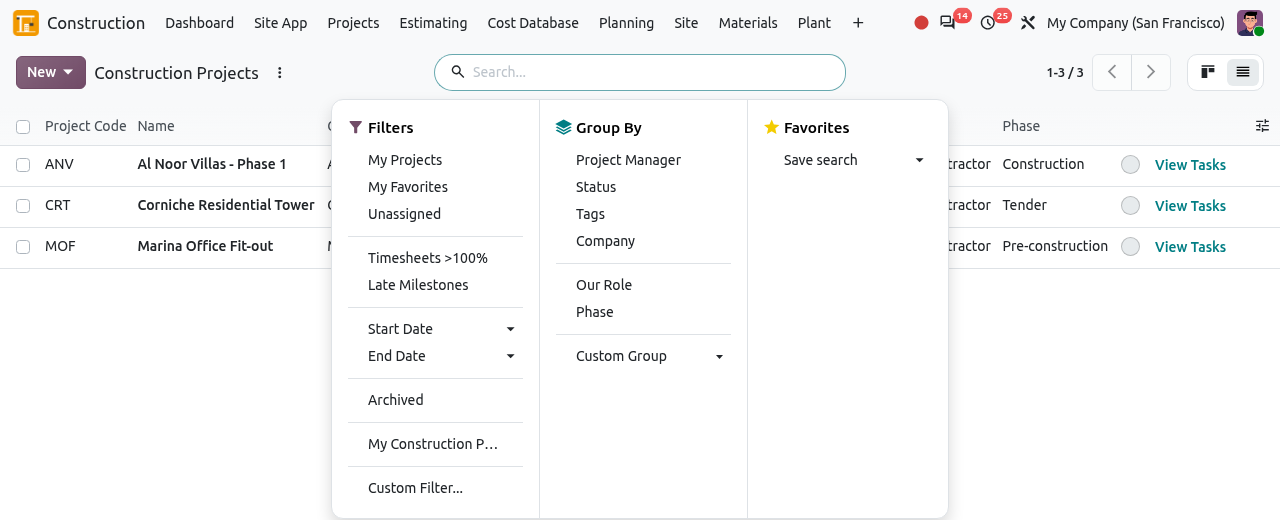
Filters and groupings. Our Role and Phase are under Group By.
CONSTRUCTION PROJECTS AND OTHER PROJECTS
This menu only shows construction projects. The standard Project app shows them too, together with the company's other projects (marketing, IT...).
Create a project step by step
In this example we create [MOF] Marina Office Fit-out: the interior fit-out of three office floors in Dubai for the client Marina Bay Holdings LLC.
Open and click New. An empty project form opens. Type the project name in the large field at the top (framed).
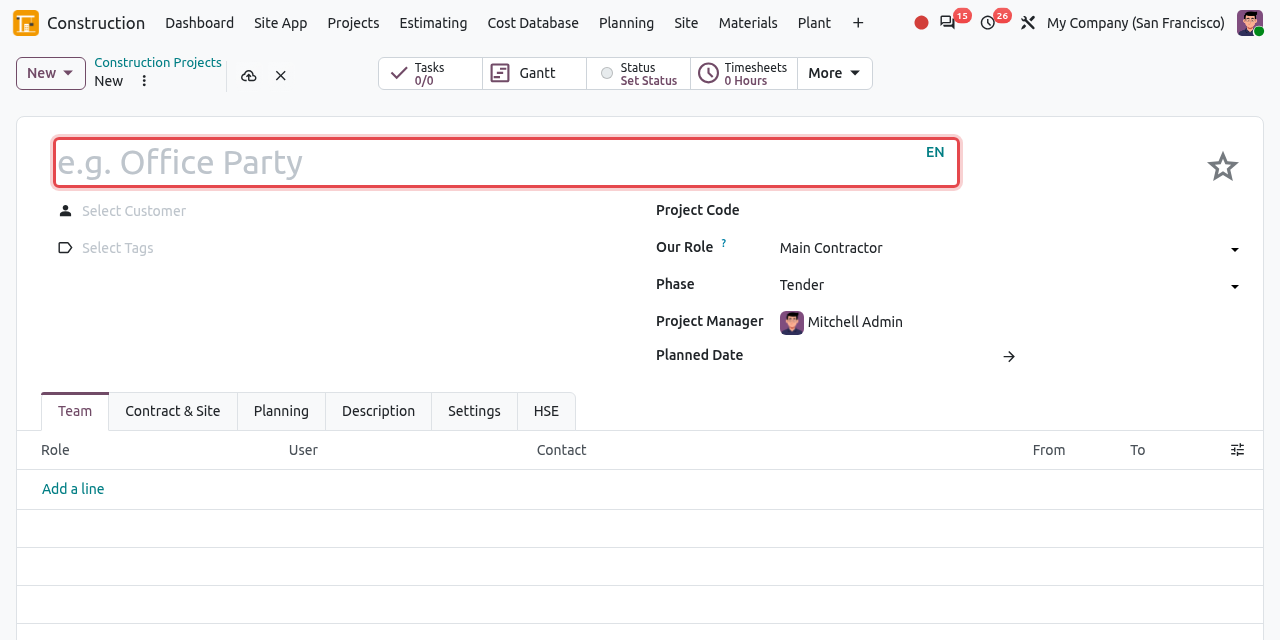
A new construction project. Our Role, Phase and Project Manager are already proposed; you can change them. TIP
When a tender is won, you do not need to create the project by hand: marking the estimate as won creates it with its client, contract type and classification (see Estimating). Open that project and complete it with the steps below.
Fill in the top of the form: the project name, the client, and the construction fields on the right.
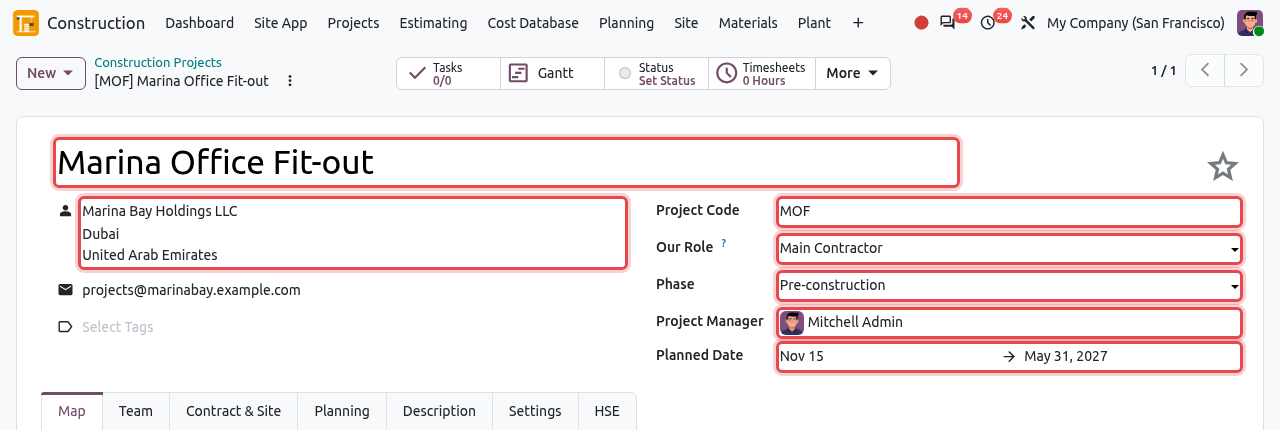
The main fields of a construction project. Field What to enter Project name A clear name, for example Marina Office Fit-out. Customer (person icon) The client, for example Marina Bay Holdings LLC. Project Code A short code, for example MOF. It is shown in brackets before the name everywhere: [MOF] Marina Office Fit-out, and is used in the numbers of documents. It must be unique in the company. Our Role The role of your company on this project (see below). Phase Where the project stands in its life (see below). Project Manager The person responsible for the project. Planned Date The planned start and end dates, for example 15 November 2026 to 31 May 2027. Tags Optional labels to sort projects. Fill in the tabs in the lower half of the form (explained one by one below): Team, Contract & Site, Description, Settings. The Planning and HSE tabs fill themselves as the project runs.
Click the save icon (cloud) next to the project name, or simply leave the form: Odoo saves automatically.
Our role (business type)
Our Role says what your company is on this project. It decides which commercial flows apply. It is proposed from the business types ticked in the settings.
| Our Role | Meaning |
|---|---|
| Main Contractor | We build for the client and bill the client. |
| Subcontractor | We do a package for a main contractor and bill the main contractor. The Main Contractor field appears in the Contract & Site tab. |
| Developer / Owner | It is our own development: we hire the main contractor (and may sell units). |
| PMC / Consultant | We manage or supervise the project for the client and certify the contractor's bills. |
Phase
The Phase shows where the project stands. Change it by hand when the project moves on; every change is logged in the chatter.
Tender→Pre-construction→Construction→Handover→Defects Liability→Closed
- Tender: we are pricing the job. New projects start here.
- Pre-construction: the job is won; contract, budget and schedule are being prepared. Projects created from a won estimate start here.
- Construction: the works are on site.
- Handover: the works are finished and handed over to the client.
- Defects Liability: the period after handover when we must repair defects (and the client still holds part of the retention).
- Closed: everything is finished and paid.
Team tab
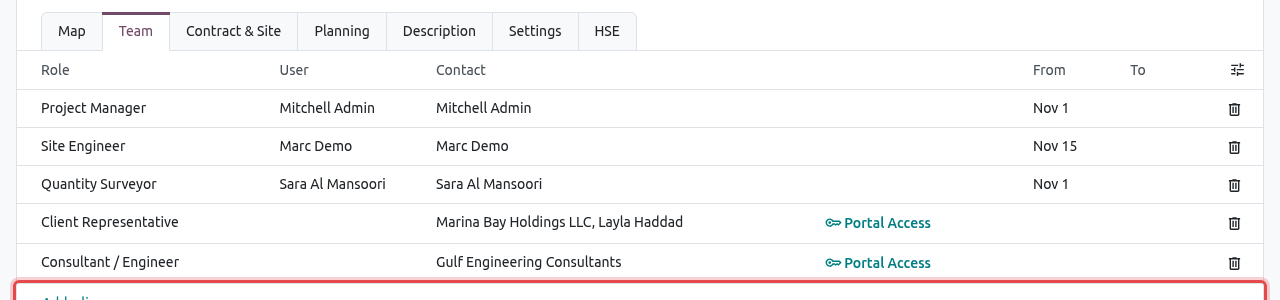
List the people working on the project and their role: click Add a line, choose the Role and the User (staff) or the Contact (outside people). Team members see the project and follow it; external parties can get portal access. See Project Teams for the details.
DON'T FORGET
Add every person who must work on the project to the team: users with the Team Member level do not see projects they are not in, and approval rules by project role (for example "the project's quantity surveyor") need someone in that role.
Contract & Site tab
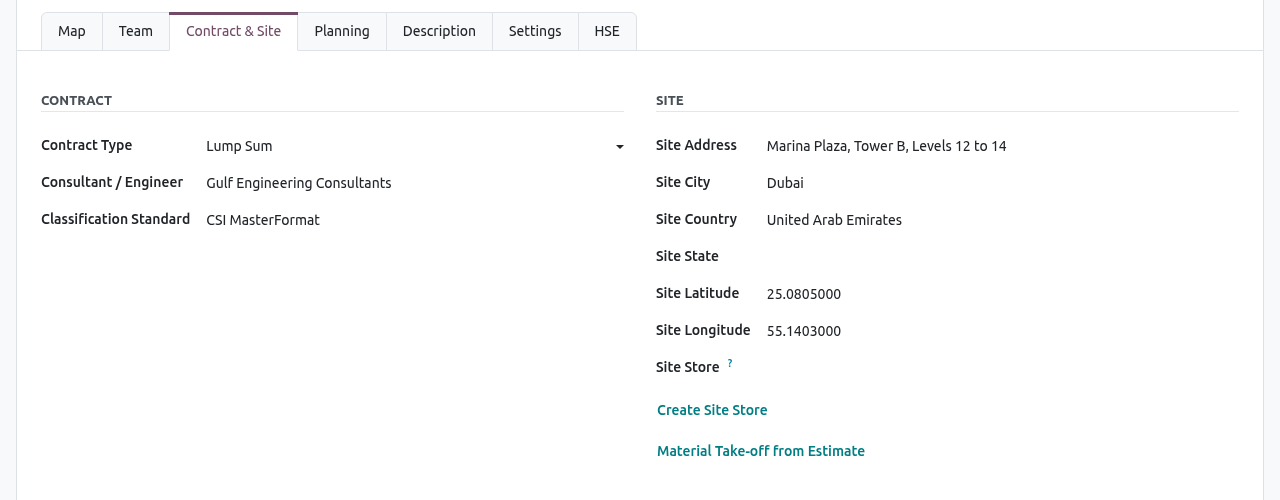
| Field | What to enter |
|---|---|
| Contract Type | Lump Sum, Unit Rate / Remeasurement, Cost Plus, Guaranteed Maximum Price, Time & Material or Design & Build. |
| Main Contractor | Shown when our role is Subcontractor, Developer or PMC: the main contractor of the job. |
| Consultant / Engineer | The consultant or engineer who supervises the works for the client. |
| Classification Standard | Proposed from the settings, for example CSI MasterFormat. |
| Site Address, Site City, Site Country, Site State | Where the site is. The country is proposed from your company. |
| Site Latitude / Site Longitude | The GPS position of the site (optional), used by the mobile site app. |
| Site Store | The stock location of the site. Click Create Site Store to create it. See Materials. |
The link Material Take-off from Estimate creates a draft material request with the materials of the won estimate that have not been requested yet (see Materials).
When the client has an address, a Map tab also shows its location on Google Maps.
Planning tab
This tab shows the progress of the works and the earned value figures. Its buttons Generate WBS from BOQ, Schedule, Set Baseline and Progress Snapshot are used by the planner. Everything is explained in Planning.
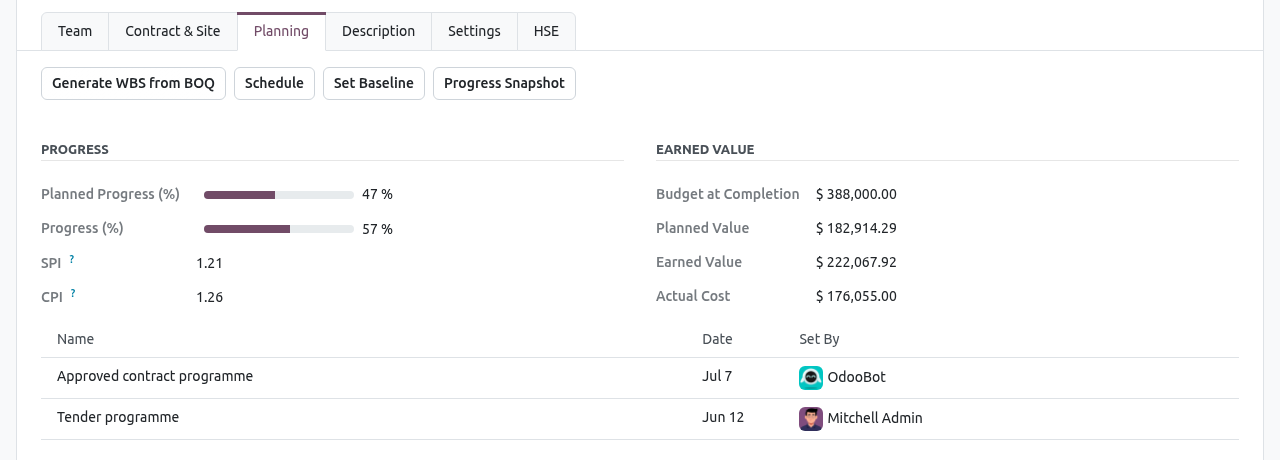
- SPI (schedule performance index): above 1 the works are ahead of schedule, below 1 they are late.
- CPI (cost performance index): above 1 the works cost less than planned, below 1 they cost more.
Description tab
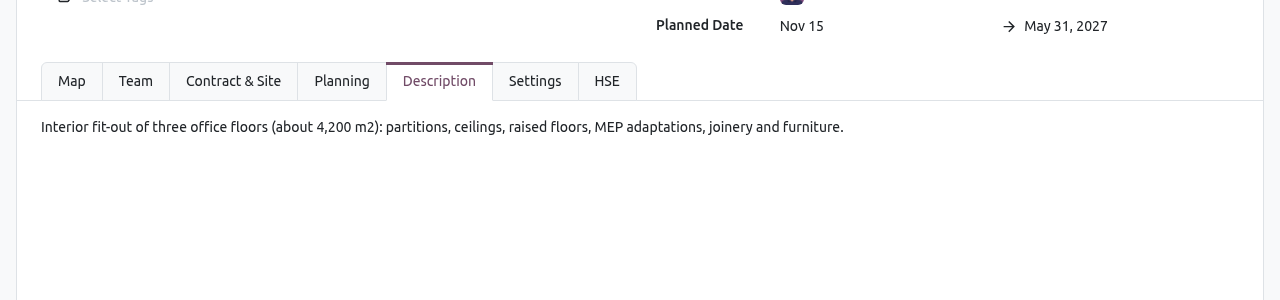
A free text describing the scope of the project.
Settings tab
These are the standard Odoo project settings.
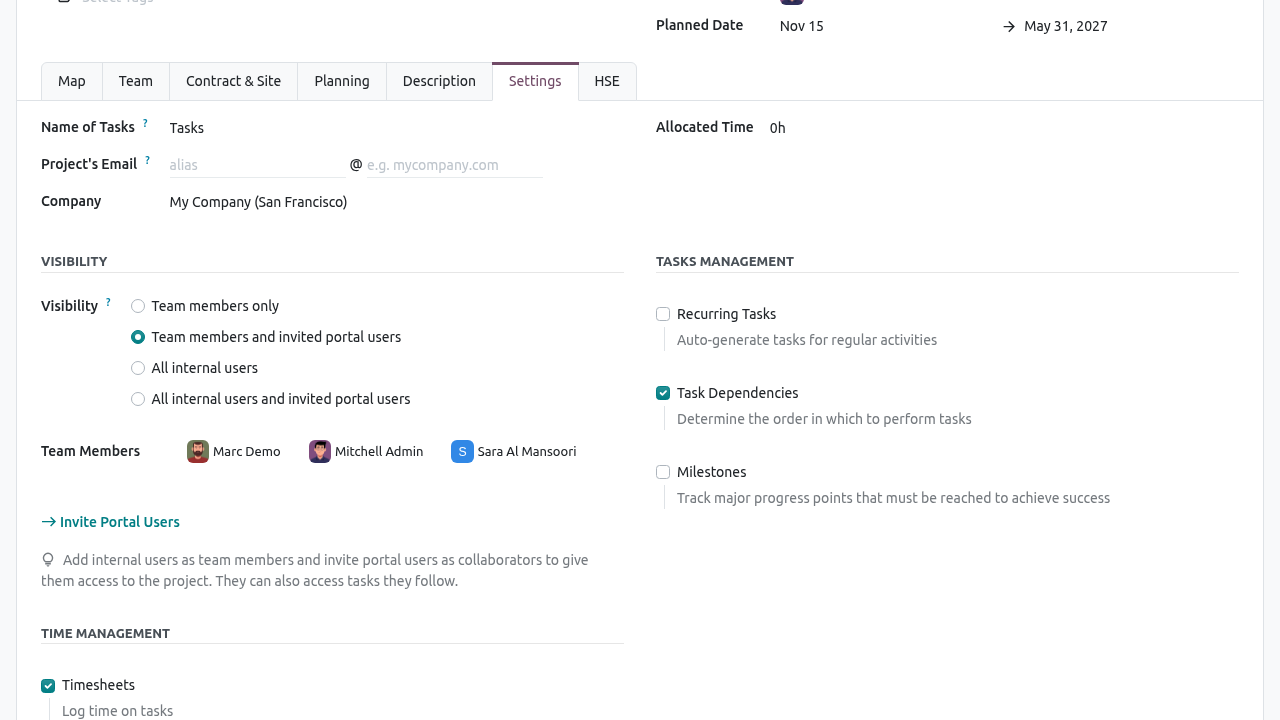
- Name of Tasks: what tasks are called (for example Activities).
- Project's Email: an email alias; emails sent to it create tasks.
- Company: the company that runs the project.
- Visibility: construction projects are set to Team members and invited portal users, so that only the team sees them. Keep this setting.
- Team Members: filled in automatically from the Team tab.
- Timesheets, Task Dependencies, Recurring Tasks, Milestones: options for the tasks of the schedule. Keep Task Dependencies ticked for planning.
HSE tab
Health and safety statistics of the project, calculated automatically from the approved daily site reports, the incidents and the toolbox talks. See HSE.
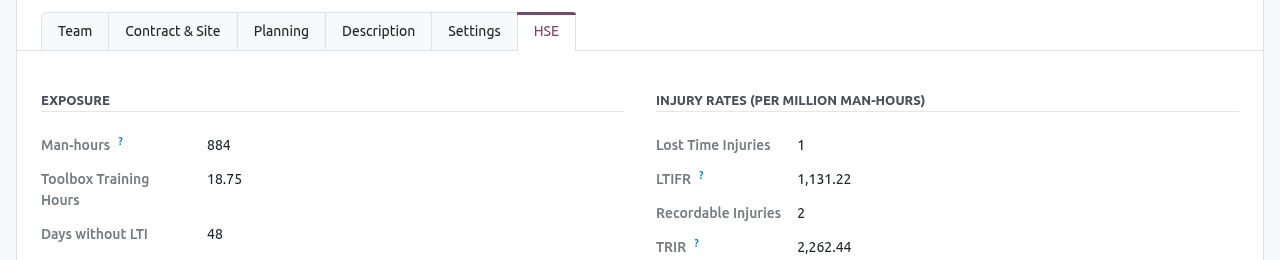
- Man-hours: hours worked on site, from the approved daily site reports.
- Lost Time Injuries (LTI): injuries that stopped someone from working.
- LTIFR and TRIR: lost time injuries and recordable injuries per million man-hours.
- Days without LTI: days since the last lost time injury (or since the start of the project).
Smart buttons
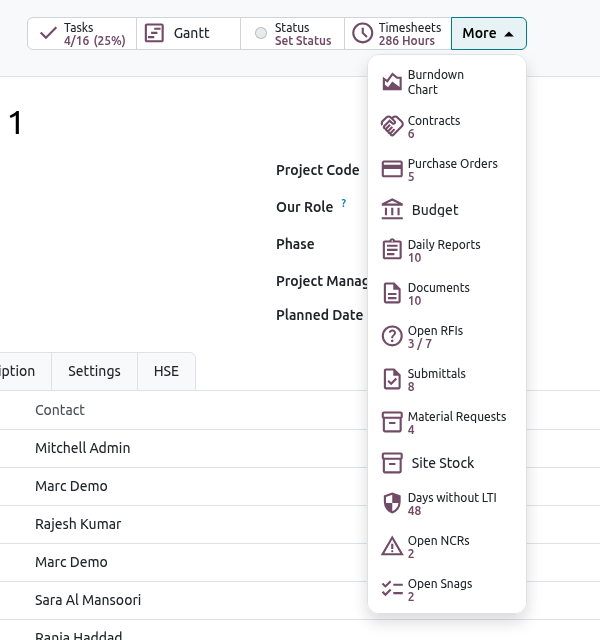
The buttons at the top of the project open everything linked to it. The first ones are always visible (Tasks, Gantt, Status, Timesheets); the others are under More.
| Button | Opens | Chapter |
|---|---|---|
| Tasks / Gantt | The activities of the schedule, as a list or a Gantt chart | Planning |
| Status | A project update (on track, at risk...) for management | - |
| Timesheets | Hours booked on the project | - |
| Contracts | Client and cost contracts of the project | Contracts |
| Purchase Orders | Purchases for the project | Materials |
| Budget | The cost budget of the project | Cost Control |
| Daily Reports | Daily site reports | Site |
| Documents / Open RFIs / Submittals | Drawings and documents, requests for information, submittals | Documents |
| Material Requests / Site Stock | Material requests and the stock of the site store | Materials |
| Days without LTI | The safety incidents | HSE |
| Open NCRs / Open Snags | Non-conformance reports and snags still open | Quality |
Tips and common mistakes
COMMON MISTAKES
- The project code must be unique per company.: another project already uses this code. Choose another one.
- A colleague cannot see the project: add them to the Team tab.
- Do not change the Company of a project once contracts or invoices exist.
TIP
The Dashboard shows all your projects side by side, with their progress, cost and margin. Click a project there to open it.