
Appearance
Health, Safety & Environment (HSE)
The HSE menu records everything that keeps people safe on site: accidents and near misses (incidents), unsafe acts and conditions spotted on site (observations), permits to work for dangerous jobs, short safety briefings (toolbox talks), site inductions and the protective equipment (PPE) handed to workers. Odoo then calculates the safety statistics of each project, such as the days without a lost time injury.
WHO USES THIS MENU
Everybody on the project can report an incident or an observation. The HSE Officer role is needed to start and close investigations and to issue permits to work. The HSE Manager also edits the permit precautions in the configuration. Roles are explained in Who does what.
Open the HSE menu
Open . On a narrow screen, HSE is under the + button of the top bar. The menu has six entries:
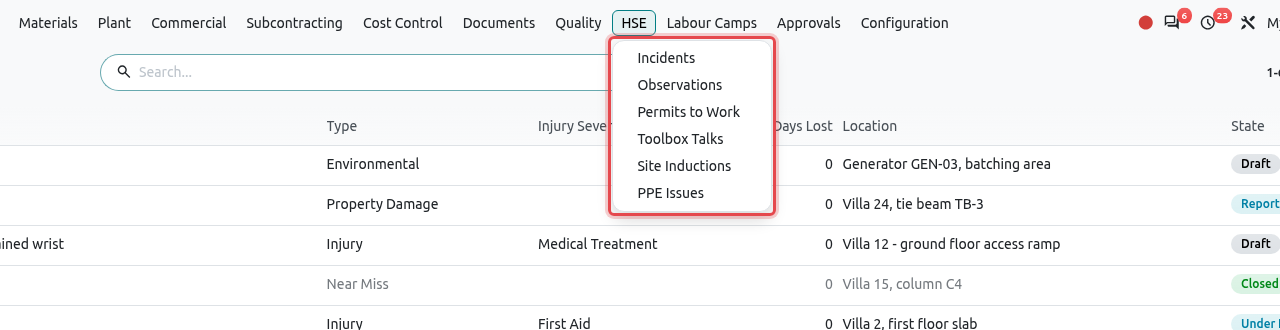
| Menu | What it is for |
|---|---|
| Incidents | Injuries, near misses, damage, spills, fires: report them, investigate them and close them. |
| Observations | Unsafe acts, unsafe conditions and good practice seen during site walks. |
| Permits to Work | Written permission for high-risk work (hot work, work at height, confined space...), valid for one shift. |
| Toolbox Talks | Short safety briefings given to the workers before work, with the attendance. |
| Site Inductions | Who received the site safety induction, and until when it is valid. |
| PPE Issues | Personal protective equipment (helmet, vest, boots, harness...) given to each worker. |
Incidents
An incident is any unplanned event on site: an injury, a near miss (something that could have hurt someone but did not), property damage, an environmental spill, a fire, a vehicle or plant accident, or a dangerous occurrence (a serious event that must be reported to the authority). Every incident follows the same life:
Draft→Reported→Under Investigation→Closed
In this example a labourer slipped on a wet ramp at Villa 12 of the [ANV] Al Noor Villas - Phase 1 project and needed medical treatment for his wrist.
1. Record and report the incident
Open . The list shows all incidents, newest first. Lost time injuries are shown in red. Click New.
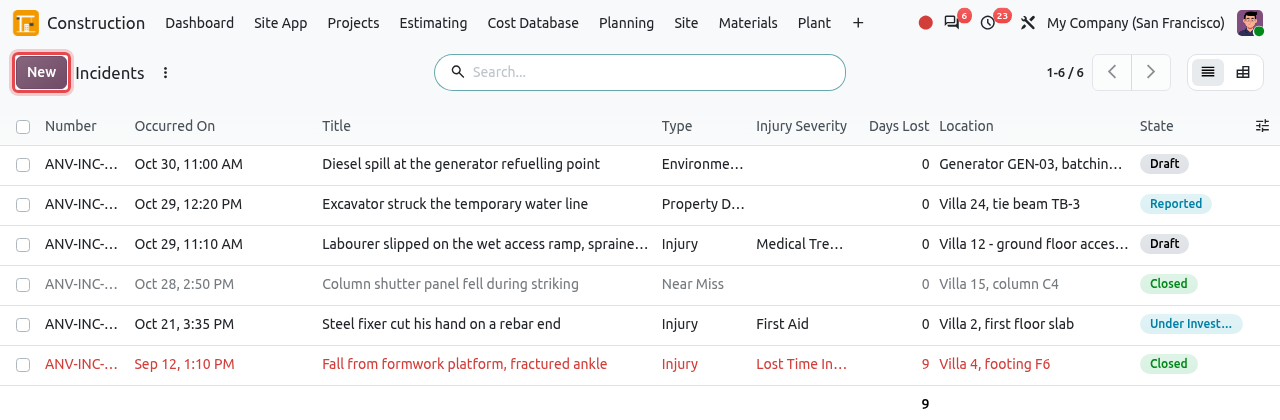
The list of incidents. The New button is framed. Type a short title of what happened (for example Labourer slipped on the wet access ramp, sprained wrist) and fill in the fields. When the Type is Injury, the fields about the injured person appear on the right.
Field What to enter Project The project where it happened. It cannot be changed after saving. Type Injury, Near Miss, Property Damage, Environmental, Fire, Vehicle / Plant or Dangerous Occurrence. Occurred On Date and time of the event (now by default). Location Where on site, for example Villa 12 - ground floor access ramp. Injured Employee The injured employee. For a subcontractor's worker or a visitor, leave it empty and type the name in Injured Person. Employer of the Injured The subcontractor or company of the injured person, if not your company. Injury Severity First Aid, Medical Treatment, Restricted Work, Lost Time Injury or Fatality. Required for an injury. Body Part Injured, Days Lost For example Right wrist, and the number of working days the person could not work. Tab What Happened The sequence of events, and under Immediate Action what was done at once (first aid, area made safe...). 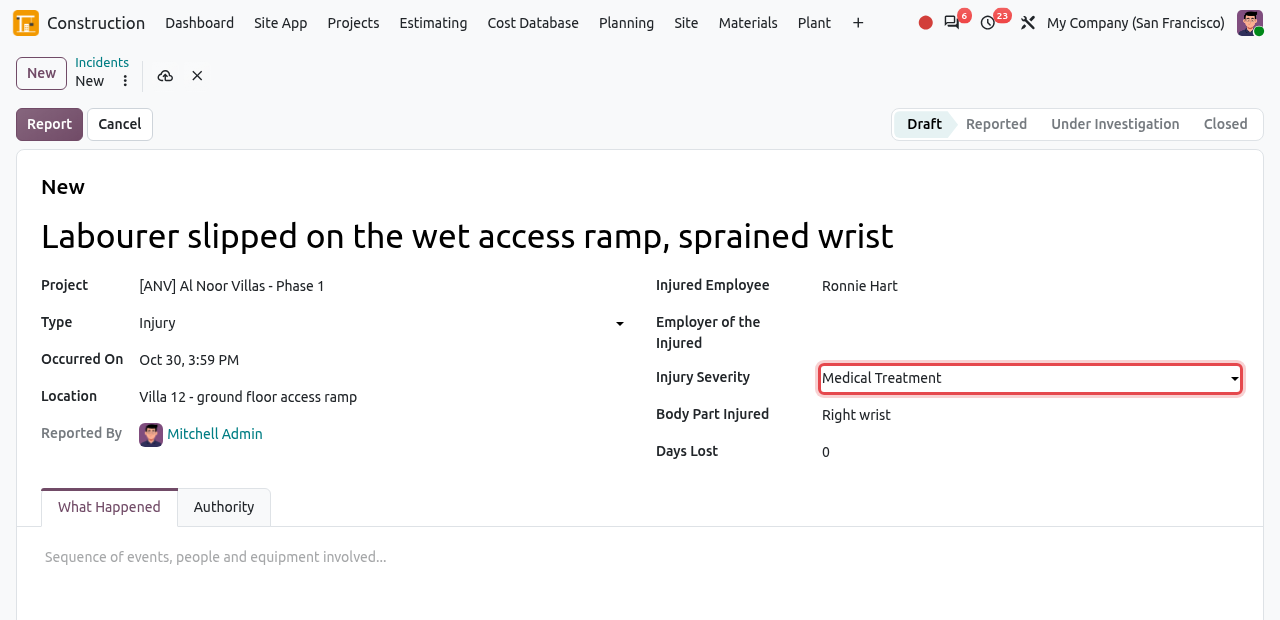
A new incident of type Injury. The Injury Severity field is framed. Save. Odoo gives the incident a number, for example ANV-INC-0006 (project code + INC + sequence). The incident is in Draft. Check the text, then click Report.
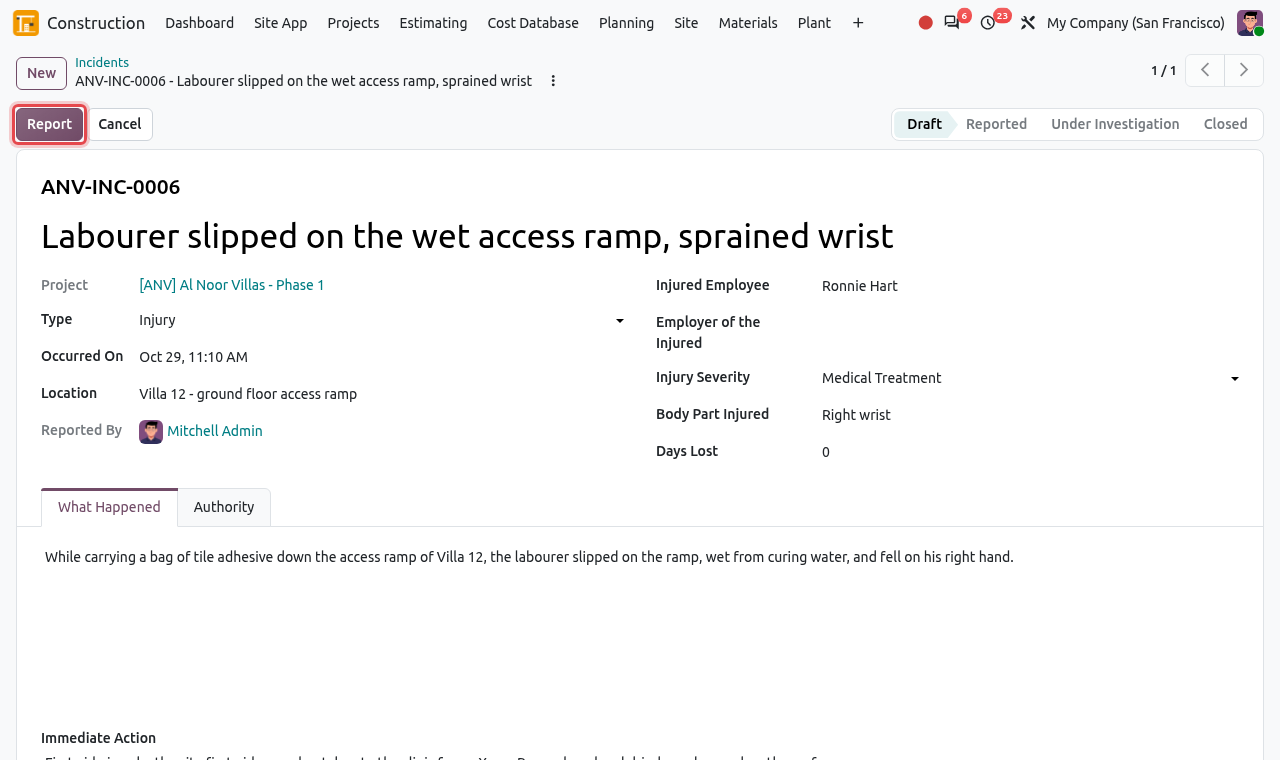
The saved incident in Draft. Click Report to alert the HSE team. The incident is now Reported. The HSE officers of the project team are added as followers and receive a message Incident reported in their inbox. A new tab Investigation appears.
SEVERITY IS REQUIRED
An injury cannot be reported without its Injury Severity. Odoo shows Give the severity of the injury of .... When you choose Lost Time Injury or Fatality, or the type Dangerous Occurrence, Odoo ticks Reportable to the Authority for you.
2. Investigate
The HSE officer opens the reported incident, goes to the Investigation tab and chooses the Investigator. Then click Start Investigation.
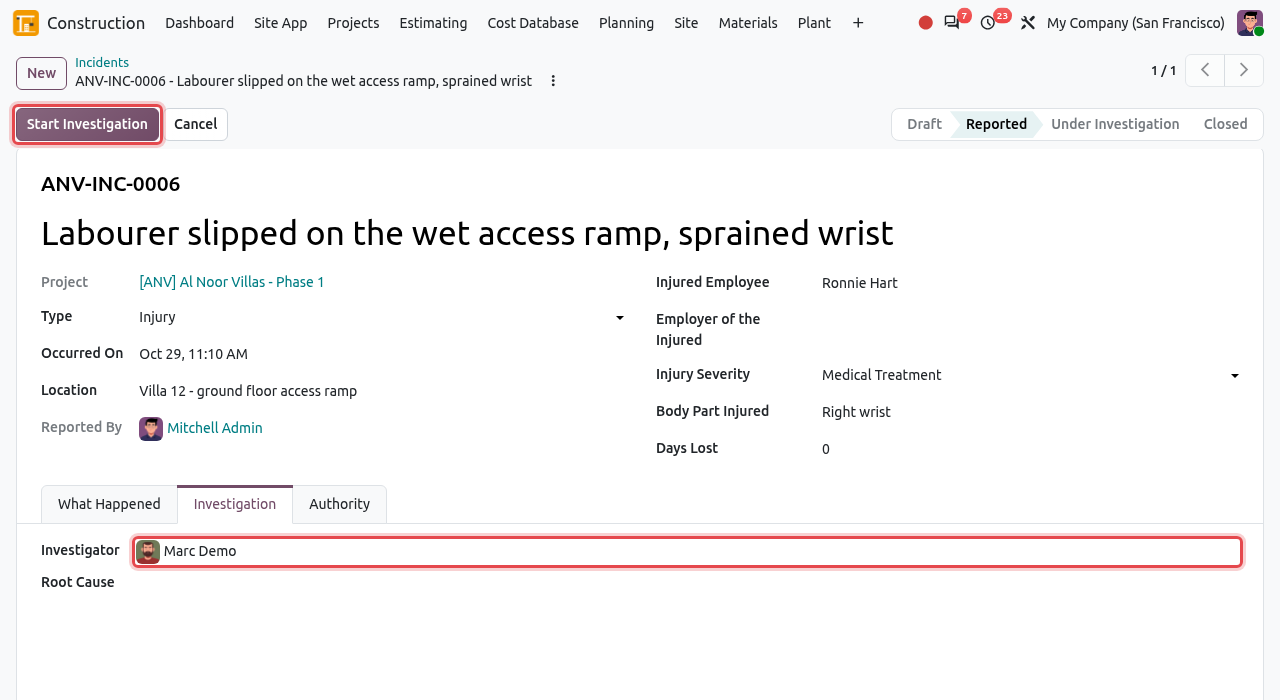
A reported incident: choose the investigator, then click Start Investigation. The incident is Under Investigation. The investigator receives a to-do activity Investigate ANV-INC-0006.... In the Investigation tab, the investigator writes the Root Cause (the real reason why it happened) and adds the corrective actions with Add a line: the action, the person Responsible and the Due date.
When an action is carried out, click Done at the end of its line. Its state changes from Open to Done.
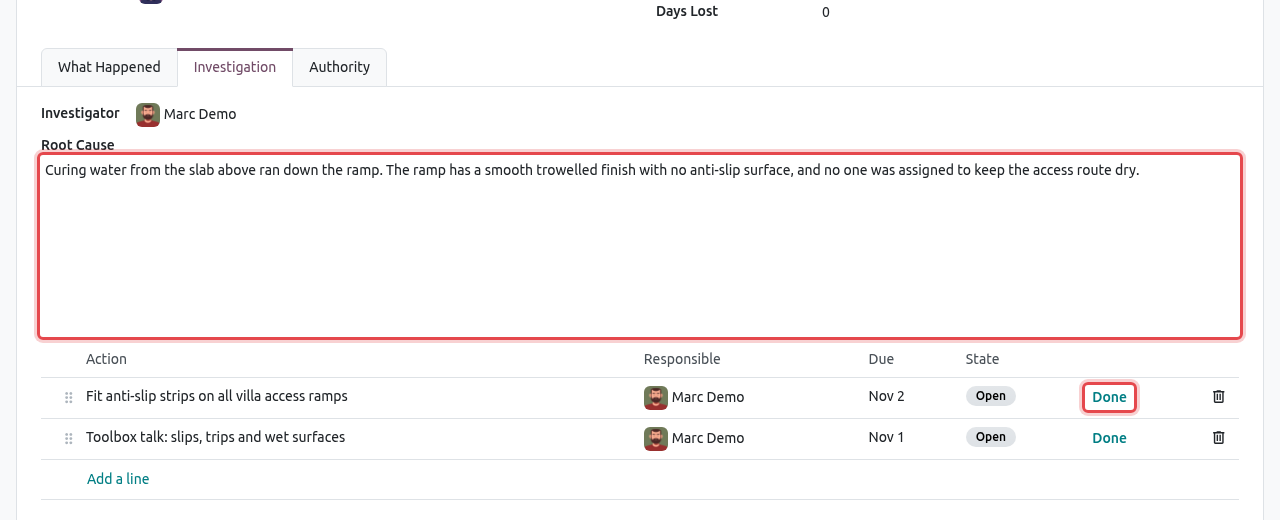
The Investigation tab: root cause and corrective actions. Click Done on each action when it is completed.
3. Close the incident
When the investigation is complete, click Close. Odoo checks three things first. If one is missing, a message tells you what to do:
- the Root Cause is filled in;
- all the corrective actions are Done (message Complete the corrective actions of ... first);
- if the incident is Reportable to the Authority, the date in Authority Notified On is filled in.
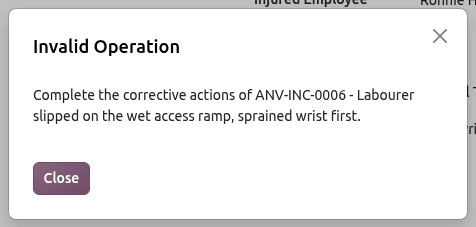
Closing is blocked while a corrective action is still open. Once everything is complete, the incident is Closed. The Closed On date is shown in the Authority tab and the investigator's activity is marked as done.
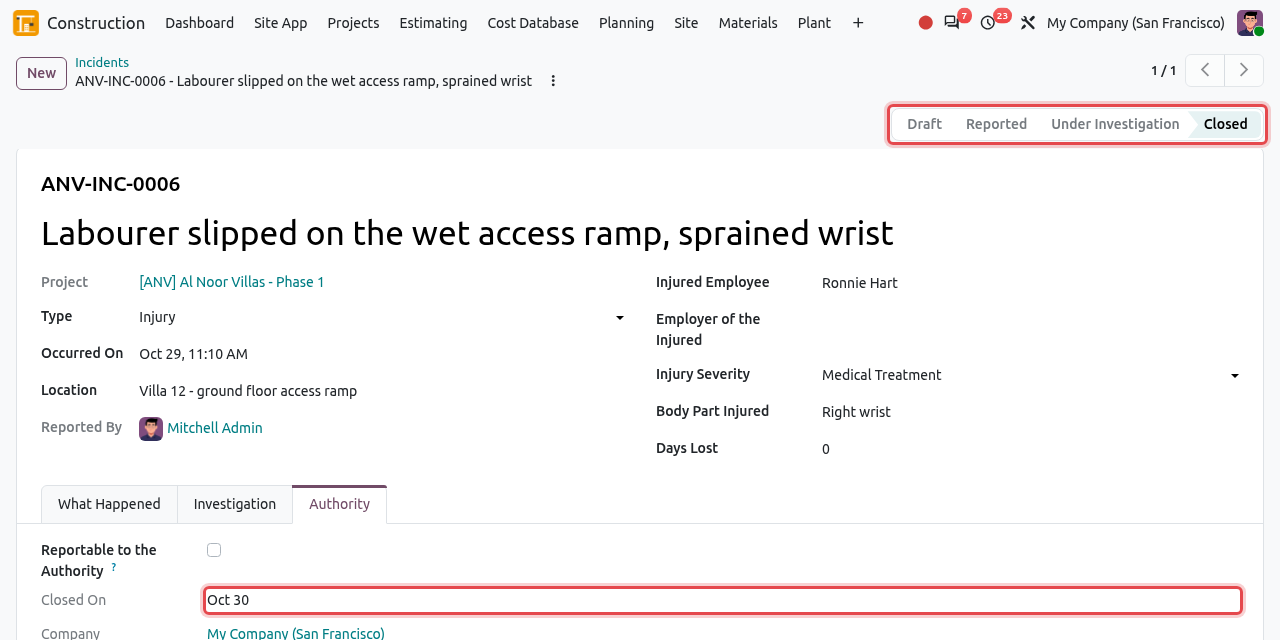
The closed incident, with its closing date.
Reportable incidents and lost time injuries
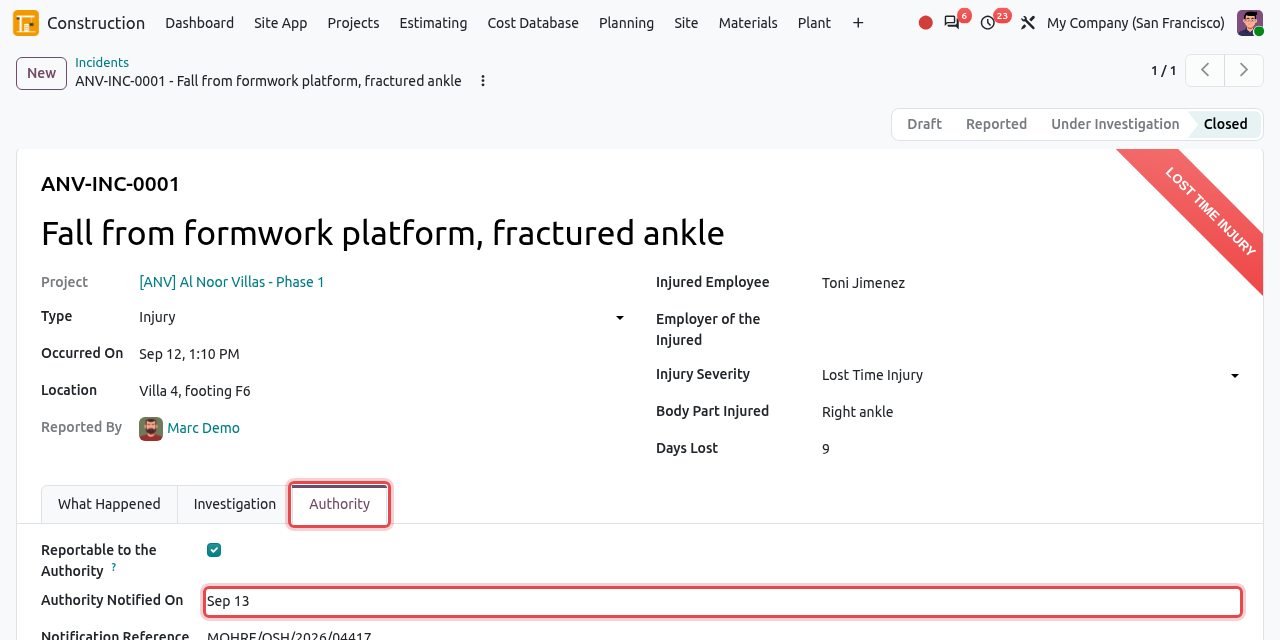
Serious injuries and dangerous occurrences must be notified to the labour authority. Open the Authority tab, tick Reportable to the Authority (if Odoo did not do it), then record the Authority Notified On date and the Notification Reference given by the authority.
When the Injury Severity is Lost Time Injury or Fatality, the incident is a lost time injury (LTI): a red LOST TIME INJURY ribbon is shown on the form and the line is red in the list.
Print the incident report
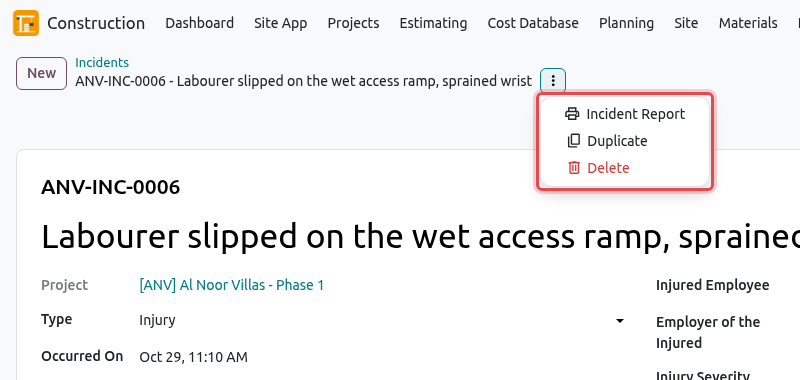
To print an incident as a PDF (for the client, the insurer or the authority), open it and click the gear icon (⋮) next to its name, then Incident Report.
TIP
Use the filters Injuries, Near Misses, Lost Time and Open of the search bar to find incidents quickly. The incidents list also has a pivot view (switch it at the top right) that counts the days lost by month and type. An incident that was recorded by mistake can be stopped with Cancel, but a closed incident cannot be cancelled.
Observations
A safety observation is something you notice during a site walk. There are three types:
- Unsafe Act: a person doing something dangerous (for example working at height without clipping the harness);
- Unsafe Condition: a dangerous situation (for example a missing guardrail, a blocked fire exit);
- Positive: good practice that you want to recognise.
Open→Closed
Open and click New. High-risk observations that are still open are shown in red.
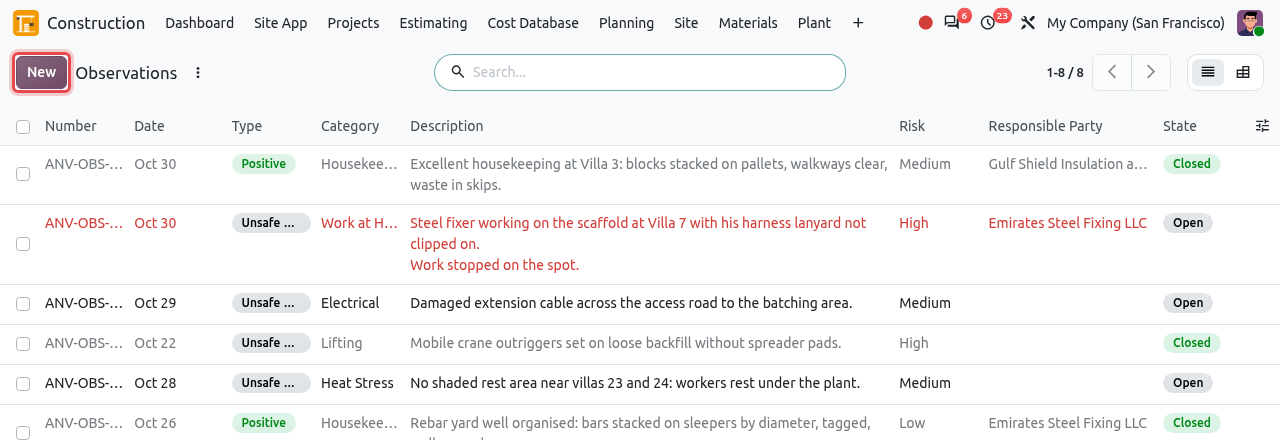
The list of observations. Fill in the form and save. It gets a number such as ANV-OBS-0007 and is Open.
Field What to enter Project The project. Type Unsafe Act, Unsafe Condition or Positive. Category PPE, Housekeeping, Work at Height, Scaffolding, Electrical, Lifting, Excavation, Traffic and Plant, Fire, Heat Stress, Environment or Other. Risk Low, Medium or High (not shown for a positive observation). Location Where on site. Responsible Party The company that must correct it, usually a subcontractor. Photo Click the camera icon to add a photo. Description What you saw, in the large text box below the fields. When the problem has been corrected, write what was done in the box Action taken to correct it... and click Close. The observation becomes Closed. If you need to open it again, click Reopen.
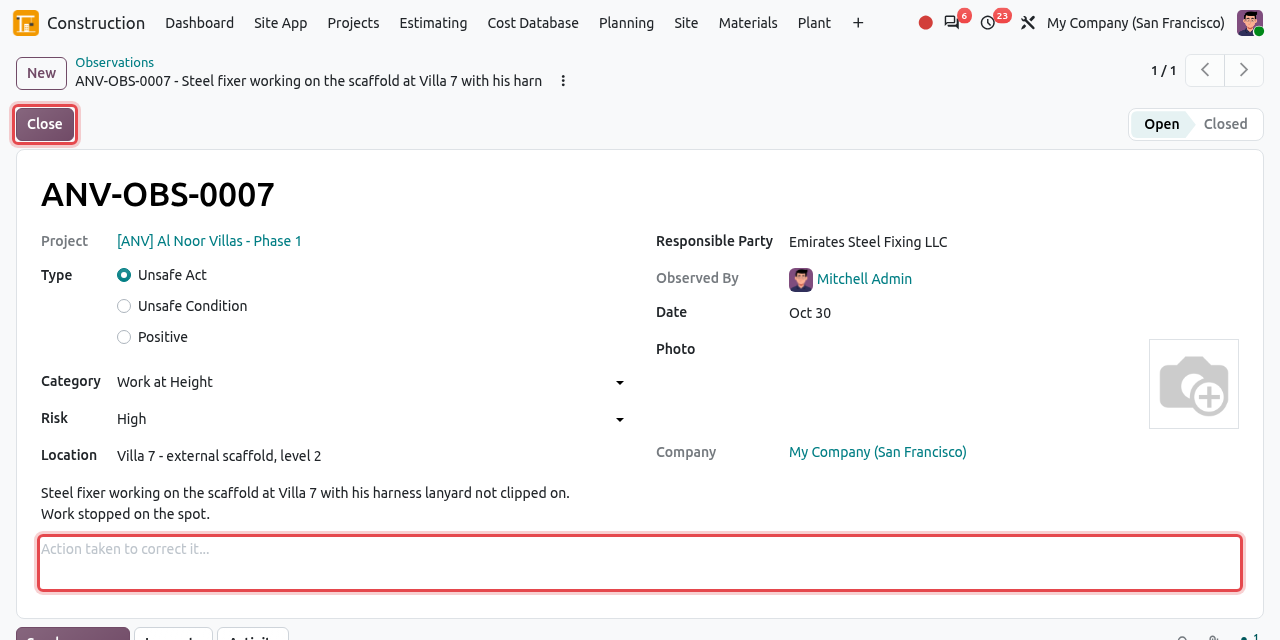
An open unsafe act. Fill in the action taken, then click Close.
ACTION TAKEN IS REQUIRED
An unsafe act or condition cannot be closed without the action taken. Odoo shows Record the action taken on ....
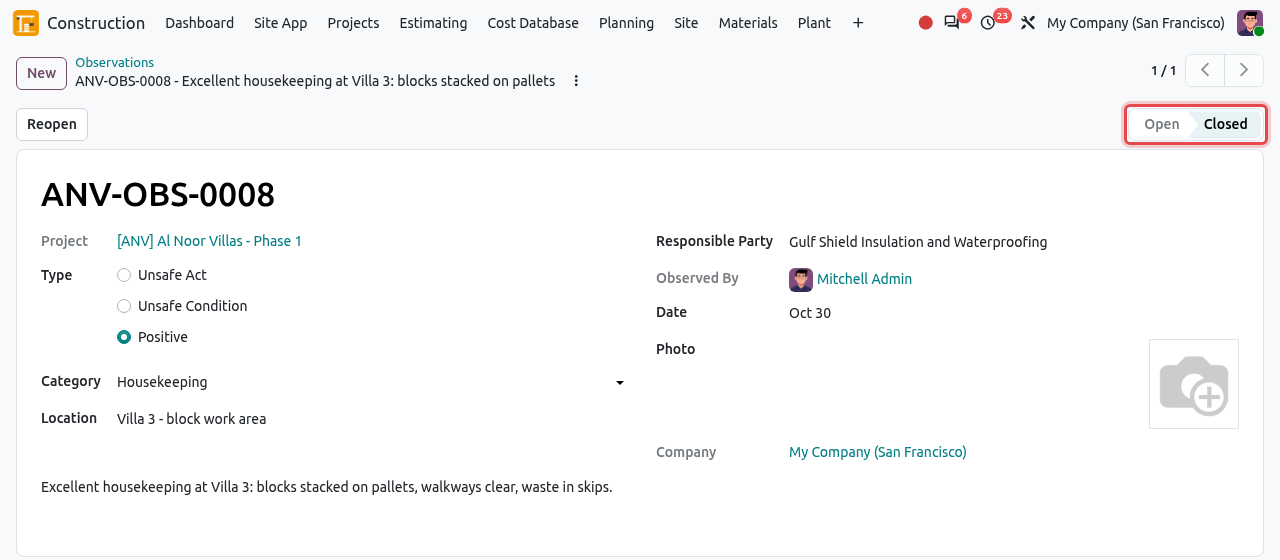
A positive observation needs no action: it is Closed as soon as you save it.
Permits to Work
A permit to work (PTW) is a written permission to carry out a high-risk job. Before the work starts, the HSE officer checks on site that every safety precaution is in place, then issues the permit. A permit is valid for one shift only (24 hours at most). The types are: Hot Work, Work at Height, Confined Space, Excavation, Electrical Isolation, Lifting Operation and General Work.
Draft→Requested→Active→Closed
An active permit can also be Suspended (work stopped for a while, for example for high wind) and resumed. In this example, the steel fixing subcontractor asks for a hot work permit to weld the staircase of Villa 9.
1. Prepare and request the permit
Open and click New.
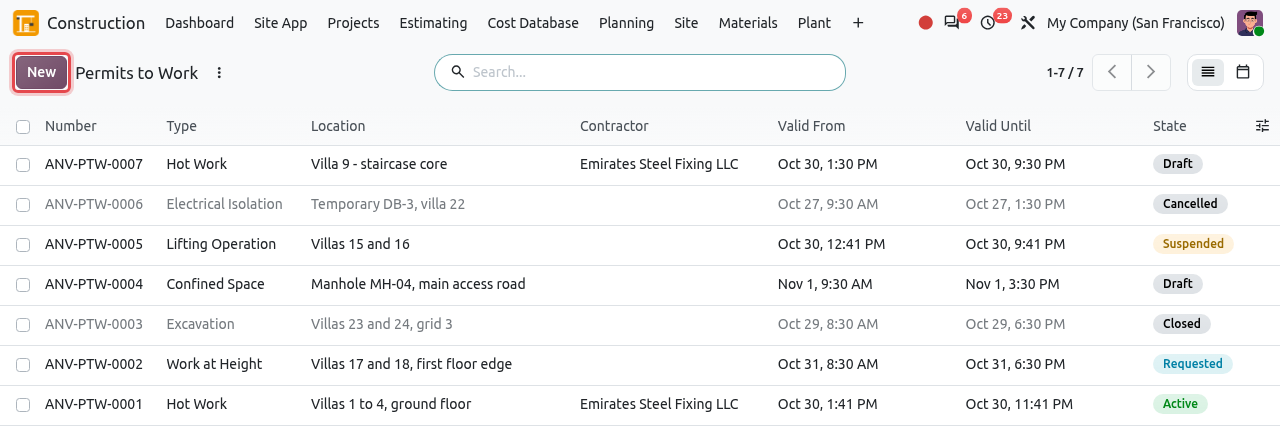
The list of permits. Expired permits are shown in red. Fill in the form:
Field What to enter Project The project. Type The kind of work. The list of precautions of that type is loaded when you save. Location Exactly where the work takes place, for example Villa 9 - staircase core. Contractor The company that does the work. Workers The number of workers. Type their names in the Workers tab. Valid From / Valid Until The shift. The end must be after the start and at most 24 hours later. Applicant The person asking for the permit (you, by default). Work description The work, the method and the equipment, in the text box under the fields. Save. The permit gets a number such as ANV-PTW-0007. The Precautions tab lists the precautions of the type. You can add your own with Add a line. If you changed the type, click Reload the Precautions of the Type. Then click Request.
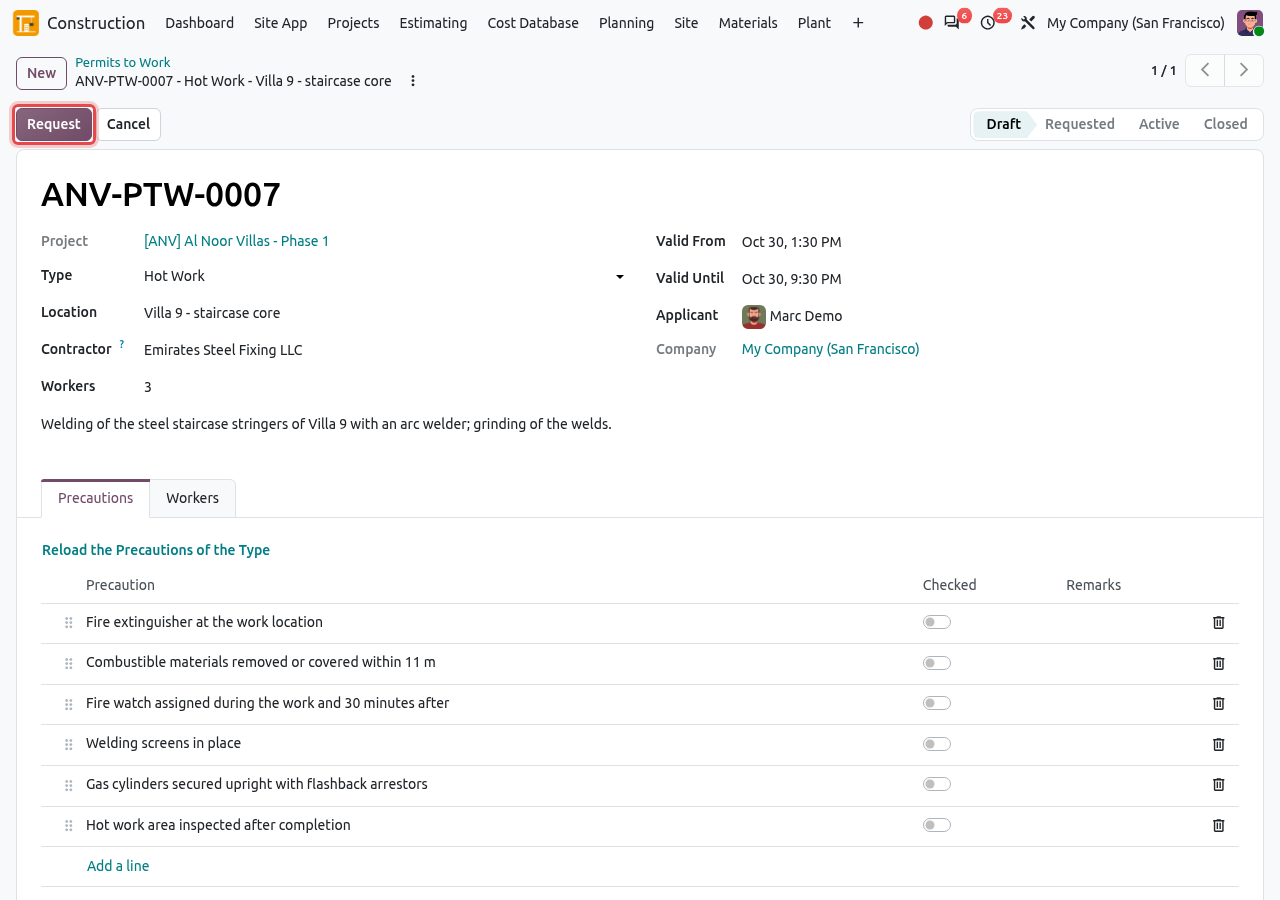
A draft hot work permit with its six precautions. Click Request to send it to the HSE officer.
2. Check the precautions and issue the permit
The permit is Requested. The HSE officer goes to the work area, checks each precaution and switches on its Checked toggle. Use Remarks for details (for example 2 x 9 kg DCP for the fire extinguishers).
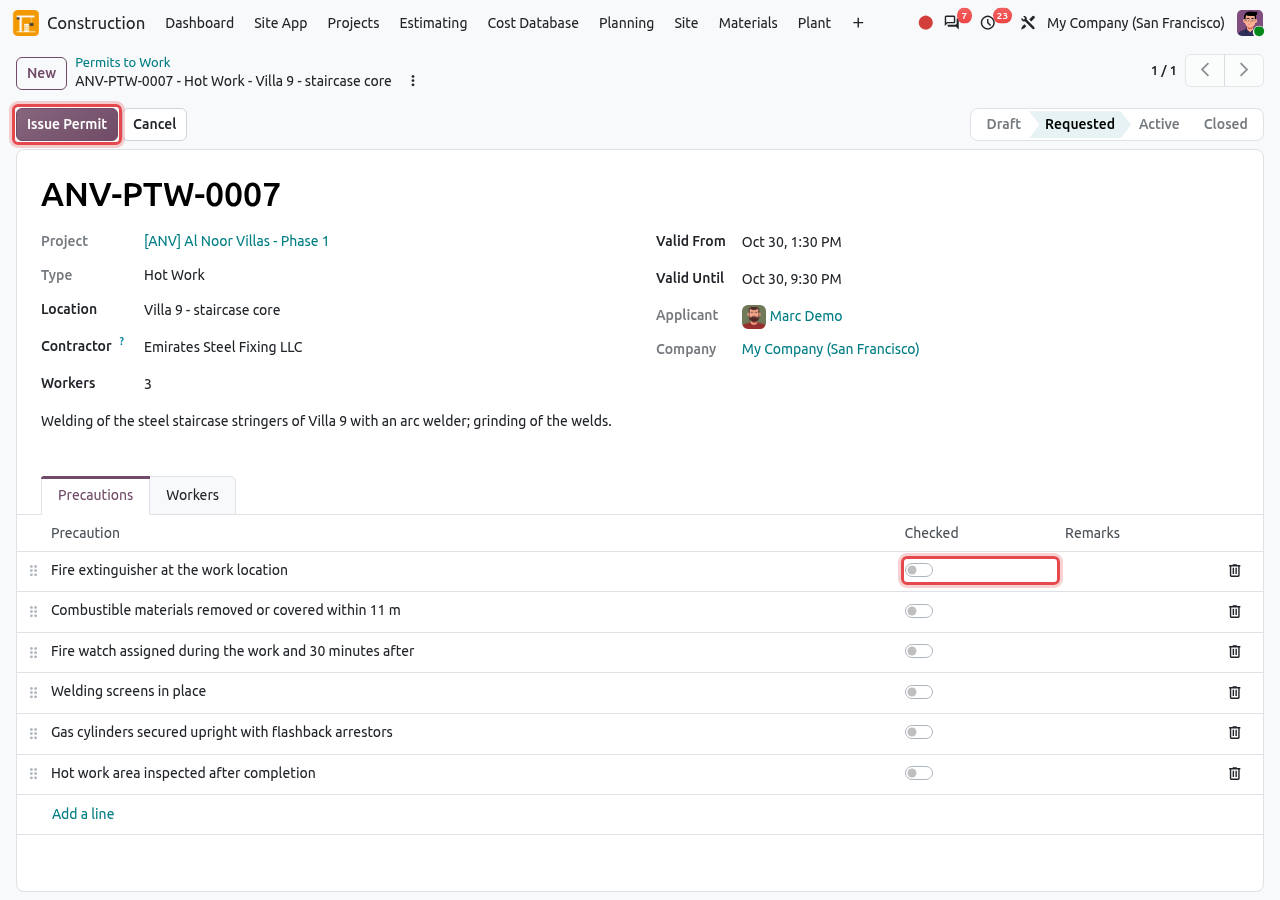
A requested permit: tick every precaution, then click Issue Permit. Click Issue Permit. If a precaution is not checked, Odoo refuses with the message Check every precaution of ... first.
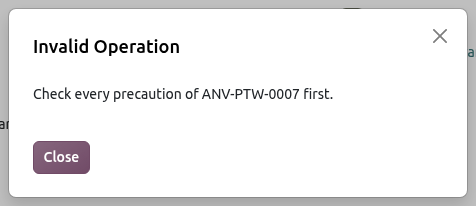
All precautions must be checked before the permit is issued. The permit is now Active and the work may start. Issued By shows the HSE officer. The precautions can no longer be changed.
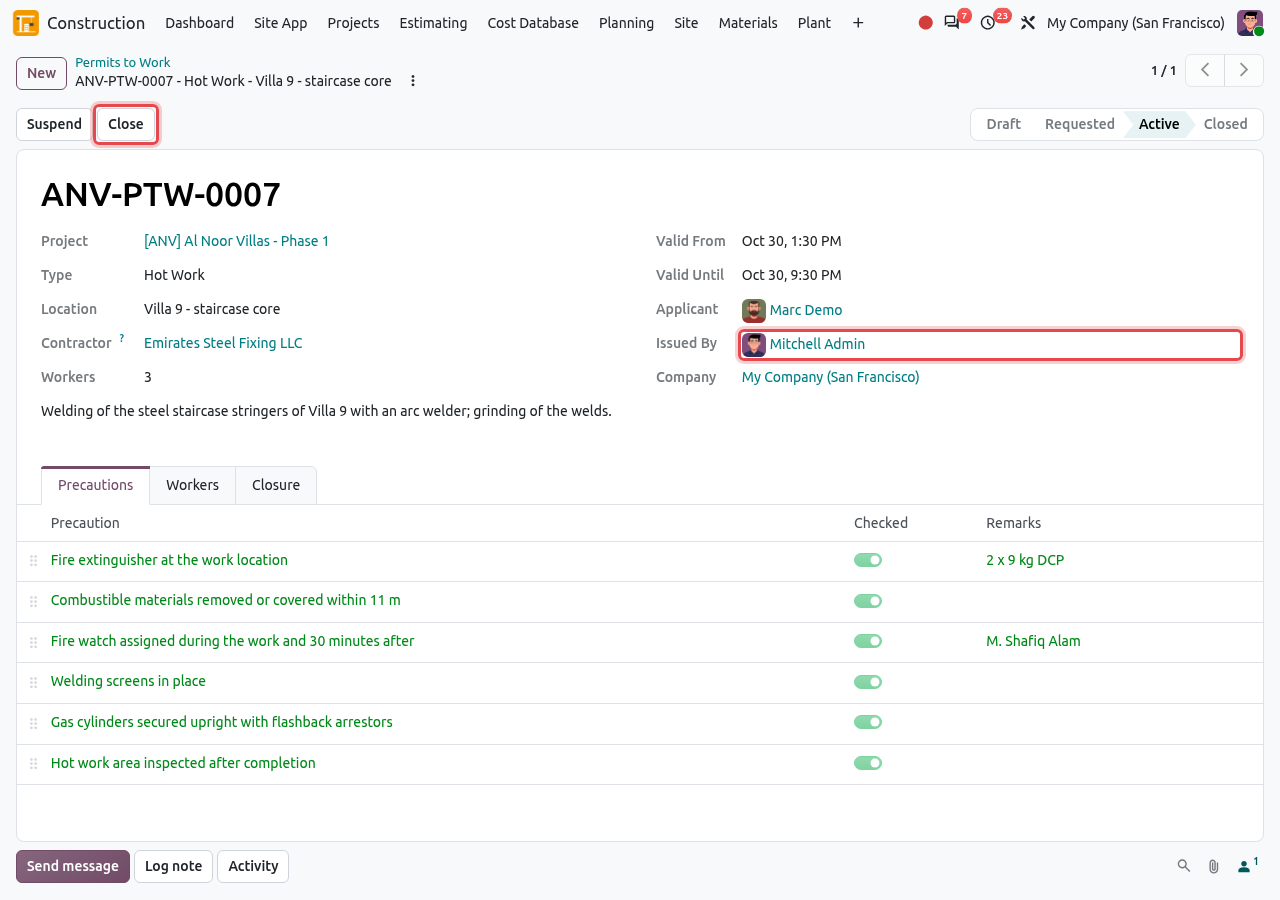
The active permit, issued by the HSE officer.
WHO CAN ISSUE A PERMIT
Only users with the HSE Officer role see the Issue Permit button, and the applicant cannot issue his own permit (message The applicant cannot issue their own permit ...): another person must check the site.
3. Suspend, resume and close the permit
If the work must stop for a while (high wind, alarm, change of conditions), click Suspend. The permit becomes Suspended. The HSE officer clicks Resume to restart it, but only while the permit is still valid: an expired permit cannot be resumed, a new one must be issued.
When the work is finished and the area is safe, open the Closure tab, write the closure remarks (work completed, area inspected, isolations removed...) and click Close. The permit is Closed.
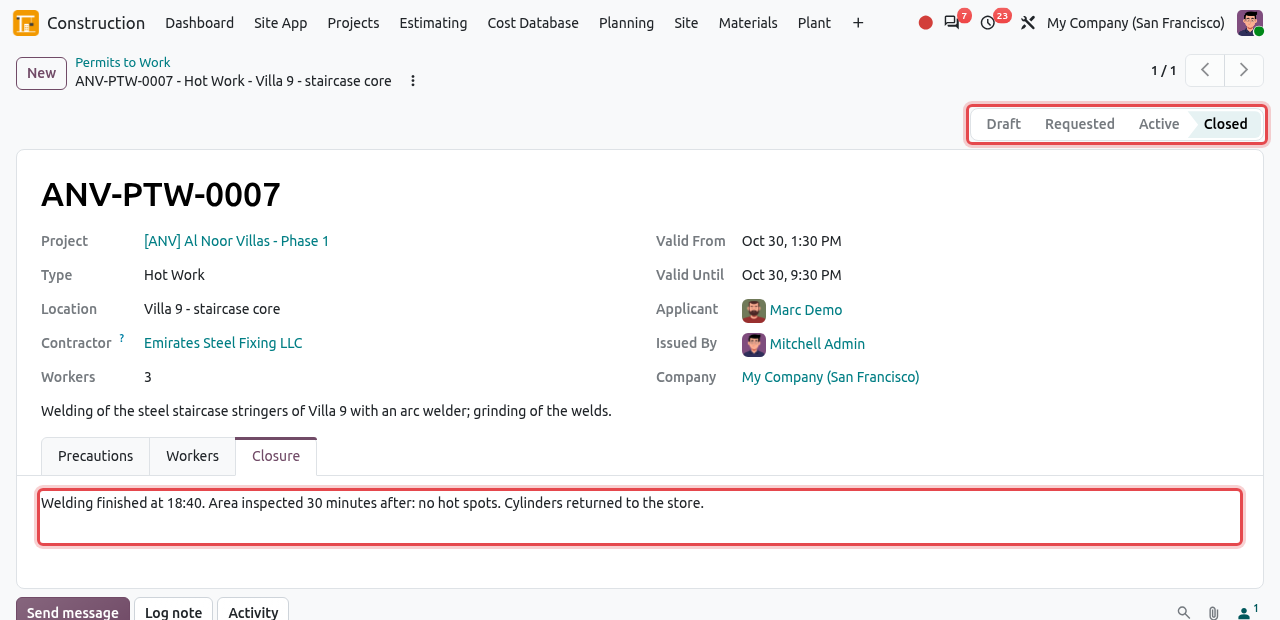
The closed permit, with the closure remarks.
Expired permits
When the Valid Until time has passed and the permit is still Active, Odoo shows a red EXPIRED ribbon on the form and the line turns red in the list. The work must stop: close the permit and issue a new one for the next shift.
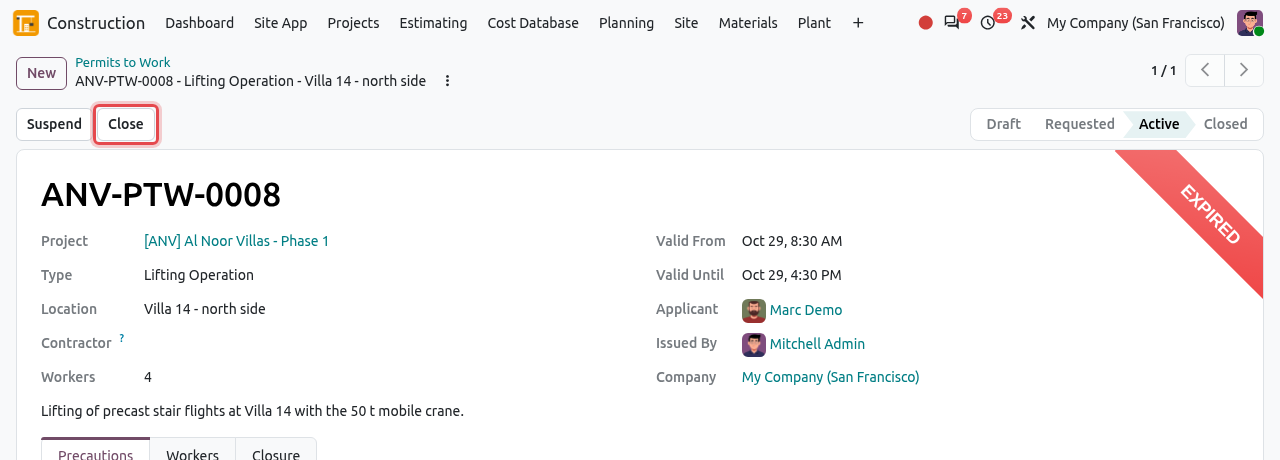
Confined spaces: the gas test
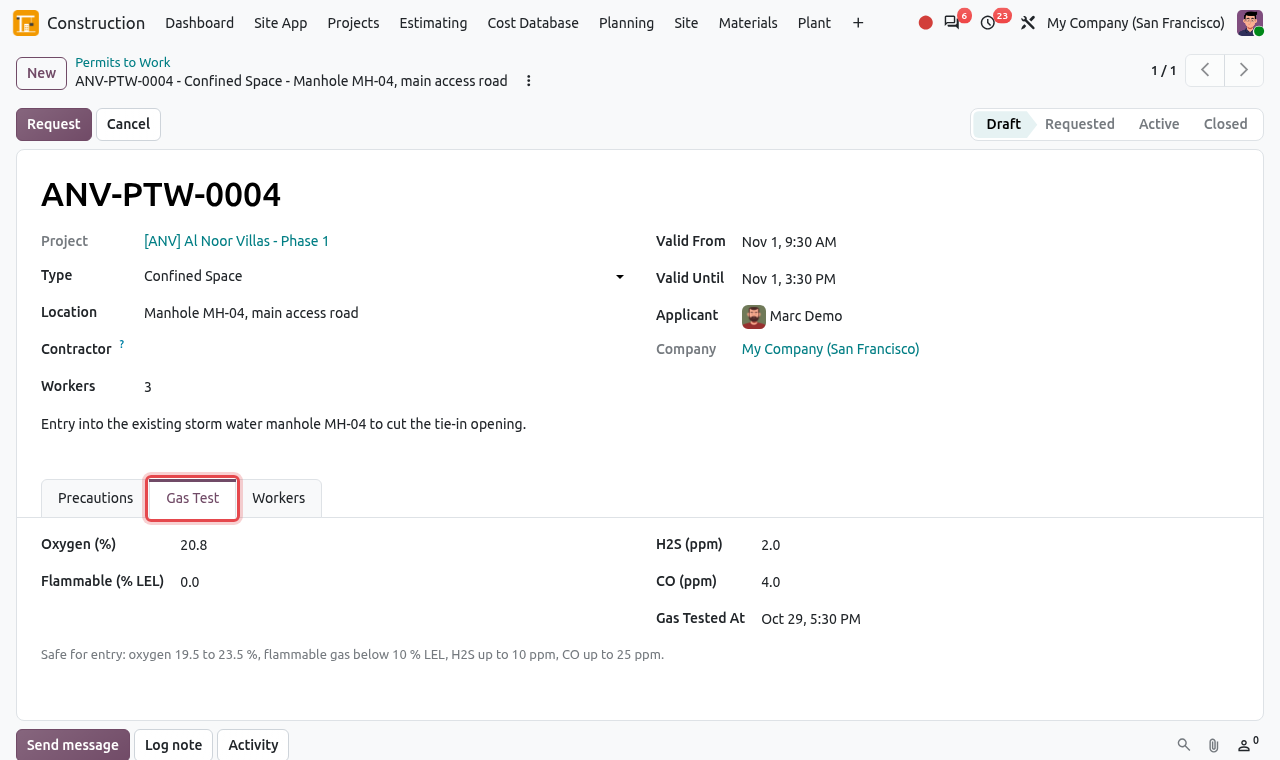
For a Confined Space permit, a Gas Test tab appears. Record the readings of the gas detector and the time of the test in Gas Tested At. The permit can only be issued when the atmosphere is safe:
| Reading | Safe for entry |
|---|---|
| Oxygen (%) | between 19.5 and 23.5 % |
| Flammable (% LEL) | 10 % or less |
| H2S (ppm) | 10 ppm or less |
| CO (ppm) | 25 ppm or less |
Calendar and print
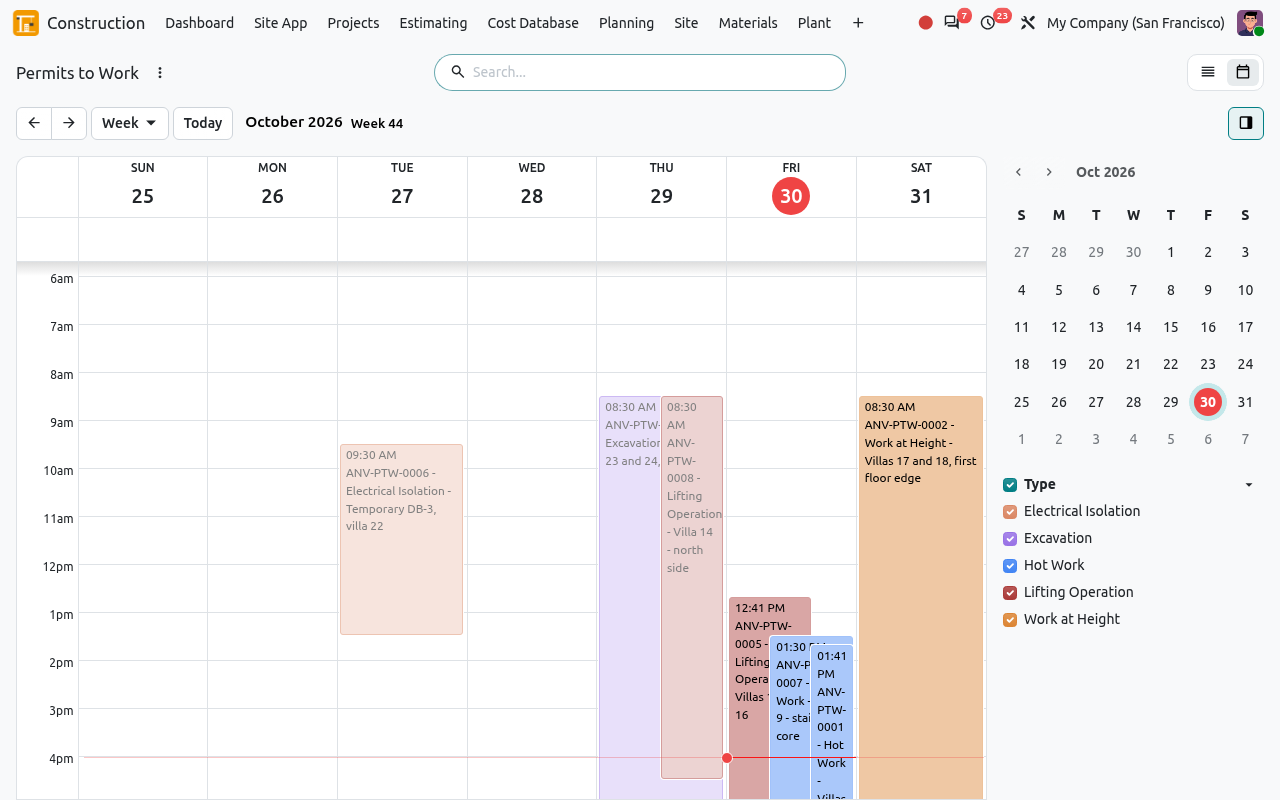
Switch the permits list to the calendar view (icon at the top right) to see which permits are planned each day of the week, coloured by type. To print a permit to post at the work area, open it and choose Permit to Work in the gear menu (⋮): the PDF lists the precautions with their check boxes and, for confined spaces, the gas readings.
Toolbox Talks
A toolbox talk is a short safety briefing (often 15 minutes) given to the workers at the start of the shift. Recording the attendance counts as training hours in the project statistics.
Planned→Held
Open and click New. Fill in:
Field What to enter Topic The subject, in the large title, for example Safe use of angle grinders. Project, Date, Location Where and when the talk is given. Duration In hours and minutes (0h 15m by default). Presented By The person giving the talk. Subcontractor Attendees The number of subcontractor workers present (a headcount). Attendees The employees present: type a name in the box under the fields and pick it. Content The points covered (hazards, controls, questions raised). Odoo calculates the Attendee Count (employees + subcontractor attendees) and the Training Hours (attendees × duration). After the talk, click Held. A talk without any attendee cannot be marked as held (message Record the attendance of ...).
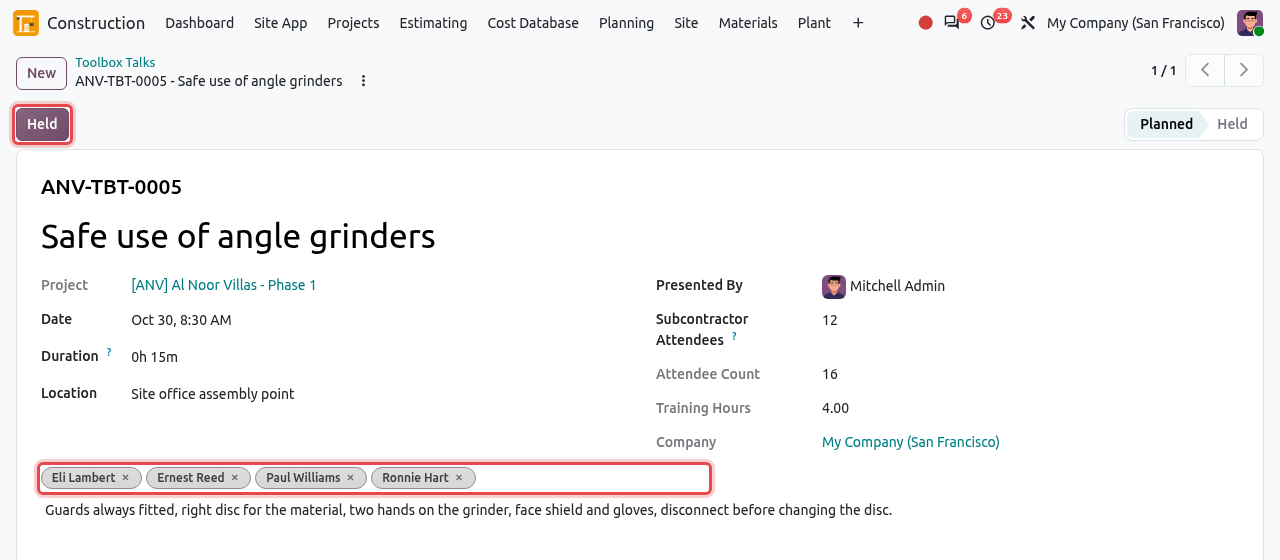
A planned toolbox talk: 4 employees and 12 subcontractor workers, 4 training hours. Click Held after the talk. The list shows the attendees and training hours of each talk, with the totals at the bottom.
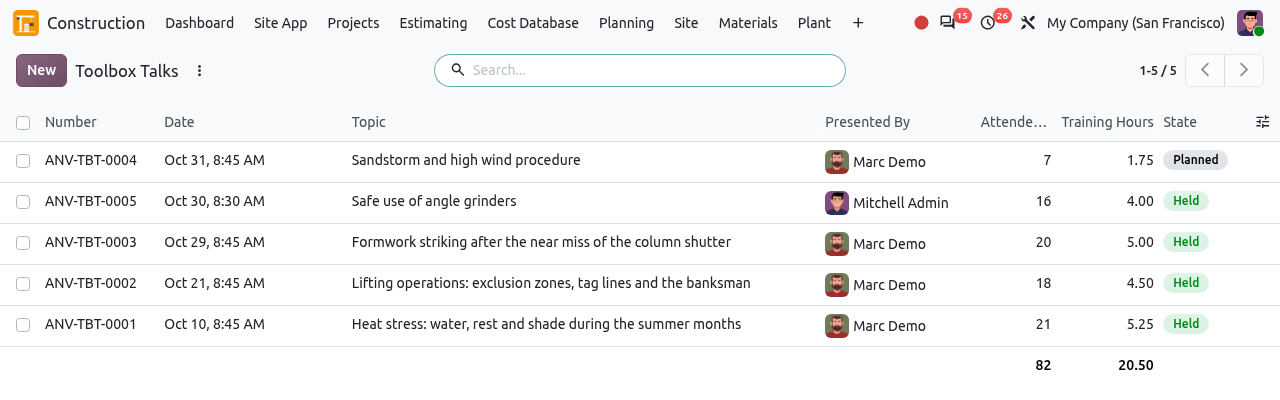
The toolbox talks of the project and their training hours.
Site Inductions
Every worker and visitor must receive the site induction (the safety rules of the site) before entering the site. The list is edited directly, line by line.
Open and click New. A new line opens at the top of the list.
Fill in the line: the Project; the Employee for your own staff (the name fills itself), or the Name and the Employer for a subcontractor's worker or a visitor; the ID / Iqama Number; the Date and Valid Until. Then click outside the line or press Enter to save.
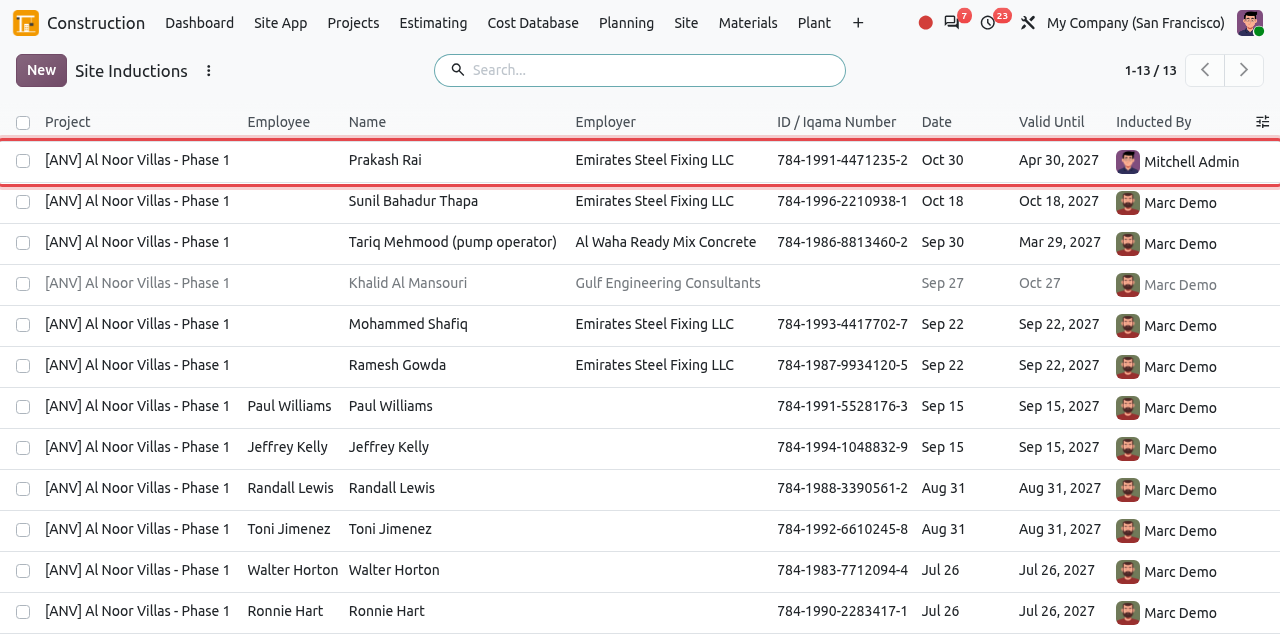
The new induction of Prakash Rai, a worker of Emirates Steel Fixing LLC. Expired inductions are greyed out.
TIP
An induction whose Valid Until date has passed is shown in grey: the person must be inducted again. An induction needs either an employee or a name.
PPE Issues
PPE (personal protective equipment) is the safety gear given to each worker: helmet, high visibility vest, boots, gloves, glasses, hearing protection, mask, harness, coverall. Recording each issue proves that the worker received it.
Open and click New.
Choose the Project and the Employee. The Date and Issued By are filled in for you.
Click Add a line for each item: choose the Item, type a Description (size, model) and the Quantity. Add a remark at the bottom if needed, then save.
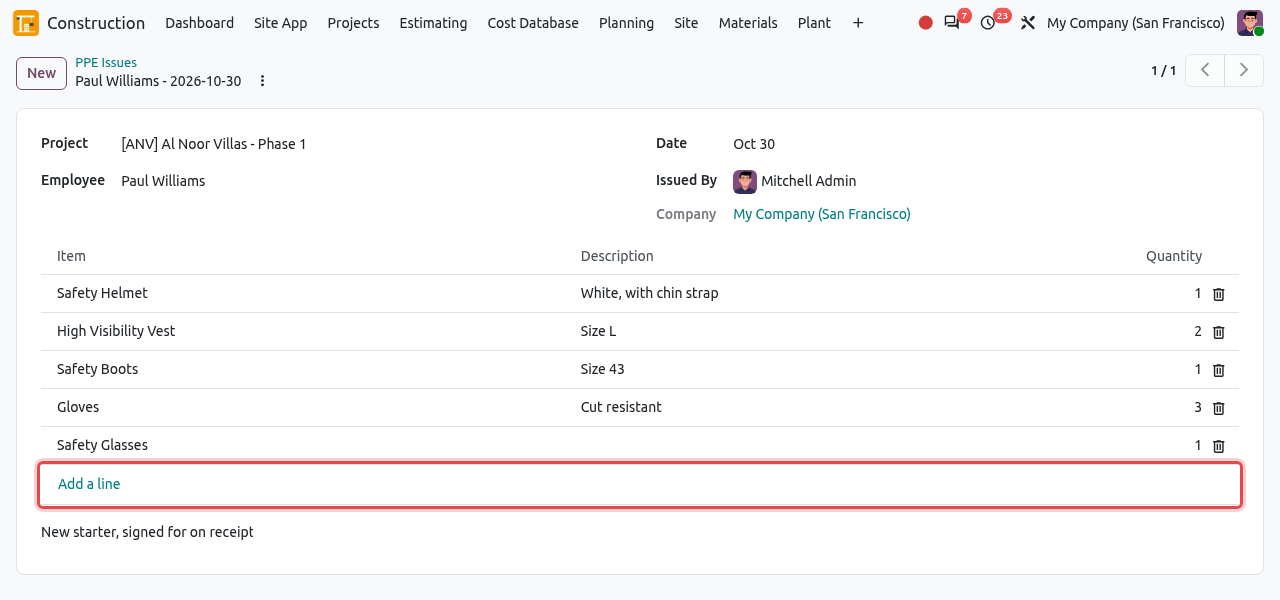
The PPE given to a new starter.
HSE statistics of the project
Each construction project shows its safety figures. Open the project () and click the HSE tab. The smart button Days without LTI at the top shows the number of days since the last lost time injury (or since the start of the project); click it to open the incidents of the project.
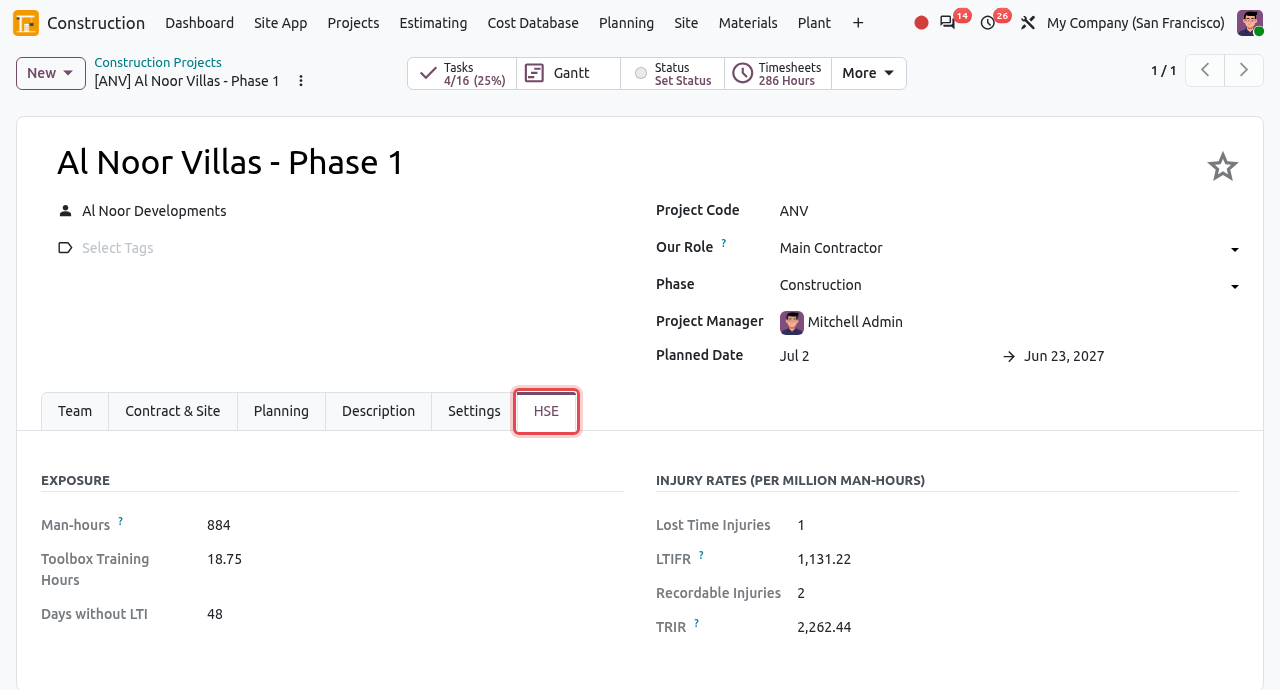
| Figure | Meaning |
|---|---|
| Man-hours | Total hours worked, taken from the approved daily site reports. |
| Toolbox Training Hours | Training hours of the toolbox talks marked as Held. |
| Days without LTI | Days since the last lost time injury. |
| Lost Time Injuries | Number of injuries with severity Lost Time Injury or Fatality. |
| LTIFR | Lost time injury frequency rate: lost time injuries × 1,000,000 ÷ man-hours. |
| Recordable Injuries | Injuries more serious than first aid: Medical Treatment, Restricted Work, Lost Time Injury and Fatality. |
| TRIR | Total recordable injury rate: recordable injuries × 1,000,000 ÷ man-hours. |
WHY ARE THE RATES SO HIGH?
The rates are per million man-hours. At the start of a project there are few man-hours, so one injury gives a very high rate. The rates become meaningful once many daily reports are approved. Cancelled incidents are not counted, and the man-hours count only approved daily reports.
Configuration: Permit Precautions
The precautions loaded on each new permit come from a list that the HSE manager maintains in . The list is grouped by permit type.
Open the menu. Click a group (for example Hot Work) to see its precautions.
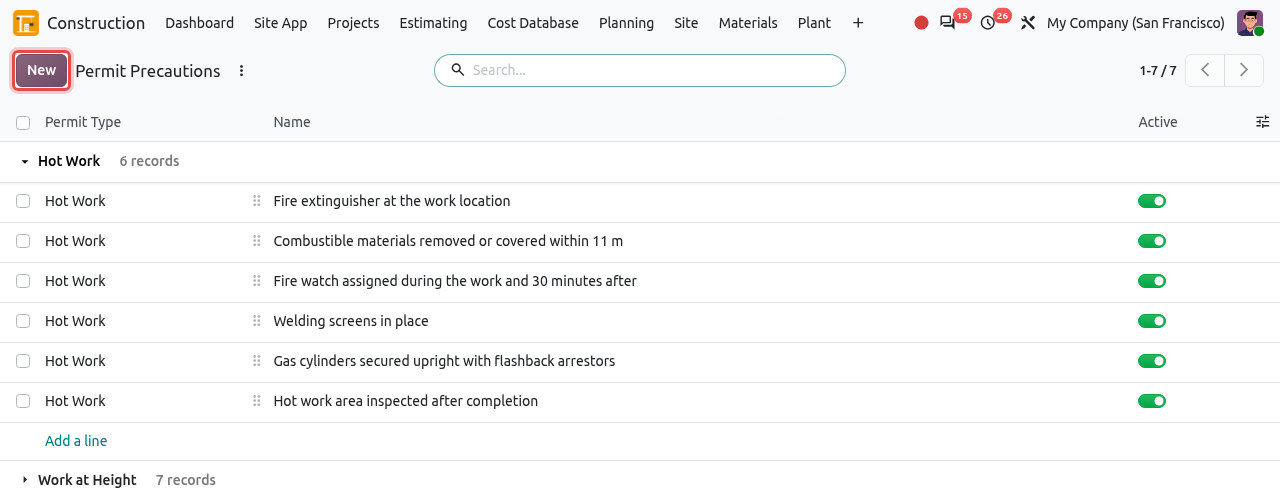
The permit precautions, grouped by permit type. To add a precaution, click New, choose the permit type, type the precaution and press Enter. Drag the handle (⋮⋮) to change the order. To stop using a precaution without deleting it, switch off its Active toggle.
TIP
Changing the list does not change the permits already created. To apply the new list to a draft permit, open it and click Reload the Precautions of the Type.