Appearance
Mobile Site App
The Site App is a simple screen made for phones and tablets. It puts the daily jobs of the people on site behind big buttons: write the daily report, check the crews in, order materials, receive deliveries, log the plant, raise RFIs, inspect, record snags and NCRs, report safety issues and approve documents. Everything you do in the Site App is saved in the same records as the office screens.
WHERE AND WHO
Open Odoo in the browser of your phone, sign in, and tap (or the Site App icon of the home screen). On a computer the same screen opens from the top menu Site App.
Users: foremen, site engineers, storekeepers, plant operators, QA/QC inspectors and HSE officers. Each person only sees the buttons allowed by their role (see the table below).
The home screen
Open the Site App. The home screen shows one tile per job. A number on a tile shows how many things wait for you (for example open material requests, deliveries to receive, plant on site). Under Daily Report you see the stage of today's report (Not started, Draft, Submitted...).
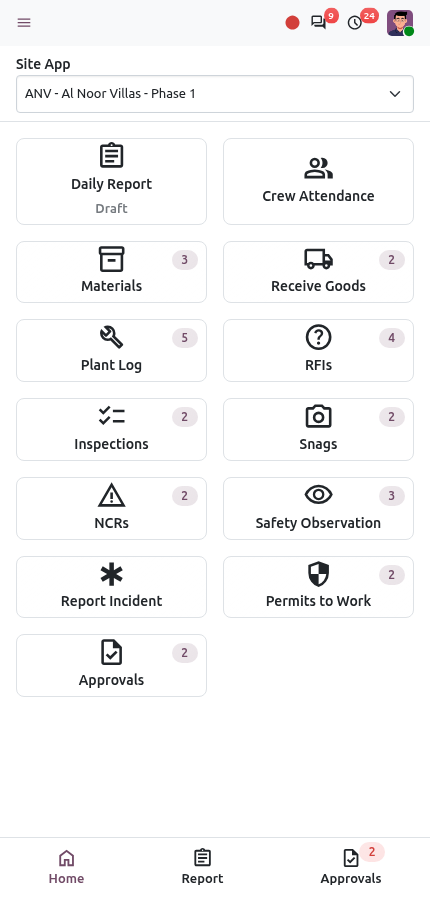
The home screen of the Site App on a phone. Check the project at the top. The app opens on the last project you used. To work on another project, tap the project list and choose it. Only construction projects that are not closed, and of which you are a team member, are listed.
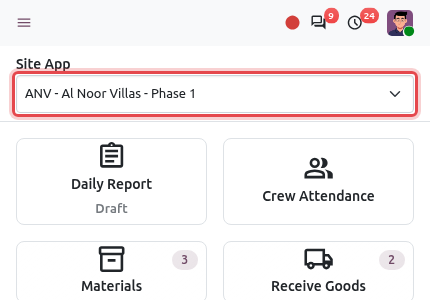
The project selector (framed). Tap a tile to open its screen. Tap the arrow ← at the top left, or Home in the bar at the bottom, to come back. The bottom bar also has Report (today's daily report) and Approvals, with the number of documents waiting for your decision.
Tiles and who sees them
| Tile | What it does | Who sees it |
|---|---|---|
| Daily Report | Today's daily site report of the project | Site Supervisor / Foreman and above |
| Crew Attendance | Check the crew members in and out | Site Supervisor / Foreman and above |
| Materials | Request materials and follow the deliveries | Site Supervisor and Project Manager |
| Receive Goods | Receive the deliveries at the site store | Inventory users (storekeepers) |
| Plant Log | Hours and fuel of the plant on site | Plant Operator, Plant Manager |
| RFIs | Raise a request for information, read the answers | Document users |
| Inspections, Snags, NCRs | Quality inspections, snag list, non-conformance reports | QA/QC users |
| Safety Observation, Report Incident, Permits to Work | HSE reporting and permits | Everyone allowed to create HSE records |
| Approvals | Approve or reject the documents waiting for you | Everyone |
Daily report
The Daily Report screen is the phone version of the Daily Site Report. It always opens the report of today for the selected project (the report without an area). If there is no report yet, it is created the first time you save.
The report is split into sections. Tap a section button at the top to switch: Manpower, Work Done, Plant, Events, Weather and Photos. Each field has its label above it.
Manpower
Tap Load Crews: all the members of the project's crews are added, with their attendance hours when they were checked in.
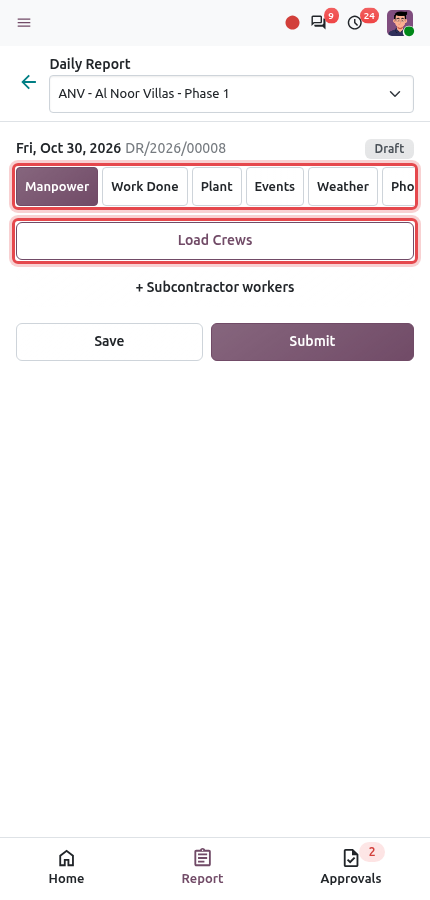
The section buttons and Load Crews (framed). For each worker, correct the Hours and Overtime with the - and + buttons, and choose the Activity. Tap × to remove someone. To add subcontractor workers who are not in a crew, tap + Subcontractor workers, type the Company / Trade and the Headcount.
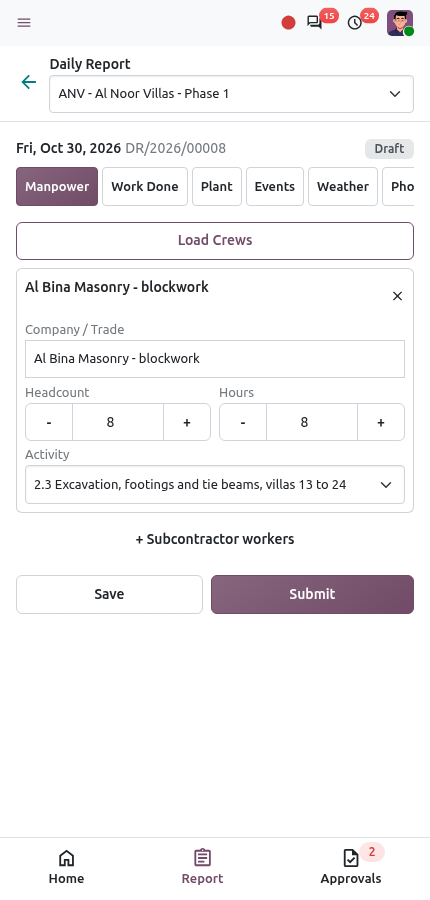
8 masons of a subcontractor, 8 hours, on the excavation activity.
Work Done
Tap Work Done, then + Work done. Choose the Activity. The app shows its current progress, for example Progress 17% of 12 t.
Enter the quantity Done today (activities with a planned quantity) or the Progress to date % (other activities), and the Location.
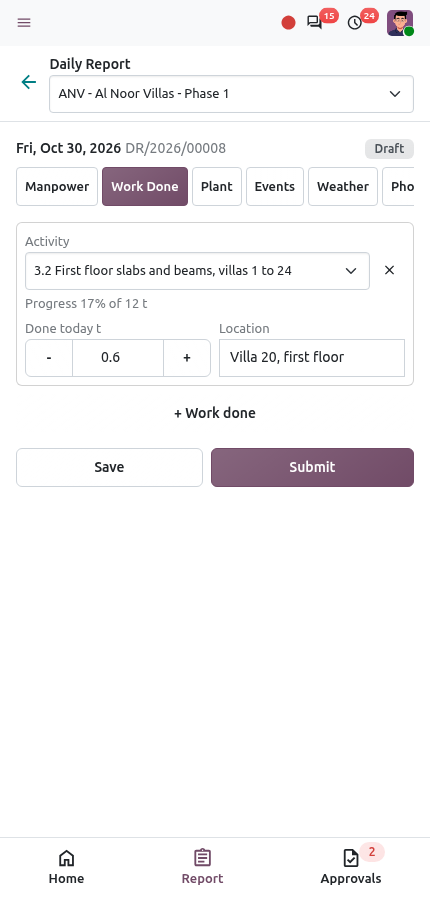
0.6 t of slab reinforcement done today on villa 20.
Plant, Events and Weather
Plant: tap + Plant and choose a machine on the project (or Other plant... and type its Description). Type the hours Worked, Idle and Breakdown.
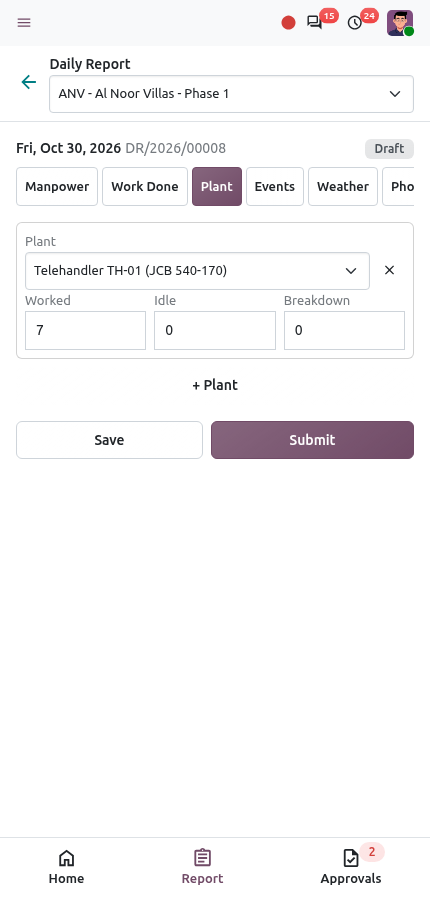
The telehandler worked 7 hours. Events: tap + Delay or event, choose the Type, describe what happened, and for a delay choose the Responsible Party and the Hours Lost.
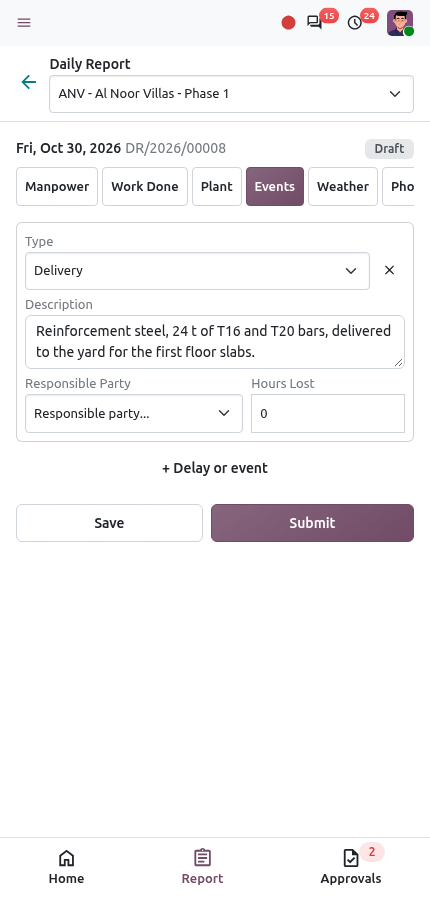
A delivery recorded in today's report. Weather: tap the weather of the day, type the minimum and maximum temperatures and any remark.
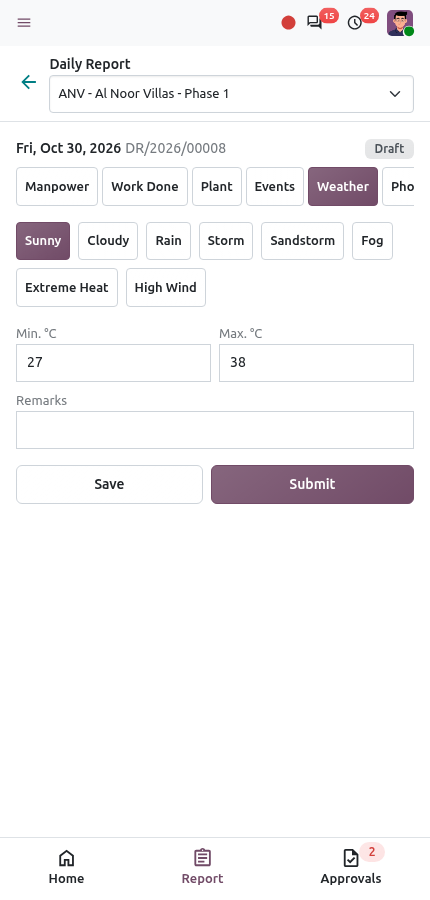
The weather buttons: the selected one is coloured. Photos: tap Take a photo. The phone camera opens; the photo is attached to the report straight away.
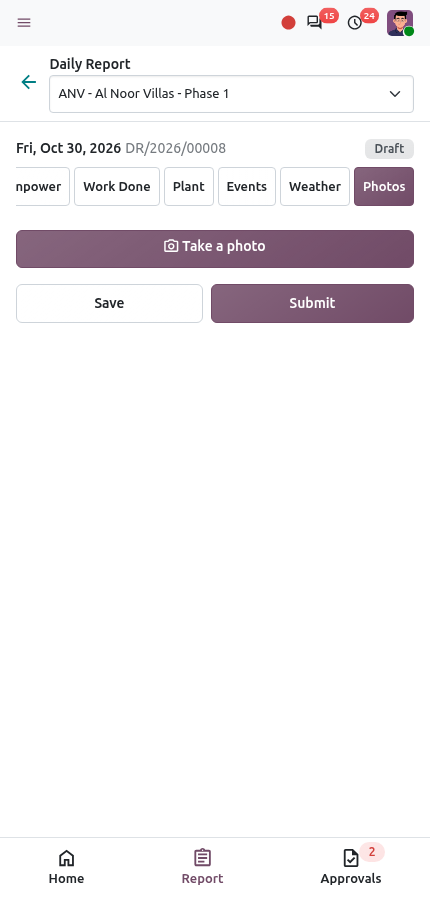
The Photos section.
Save and submit
Tap Save as often as you like during the day. The message Report saved. confirms it. You can come back and continue later.
At the end of the day, tap Submit. A confirmation window opens: "Once submitted, the report can no longer be edited. Submit it for approval?". Tap Submit to confirm, or Cancel to go back and continue editing.
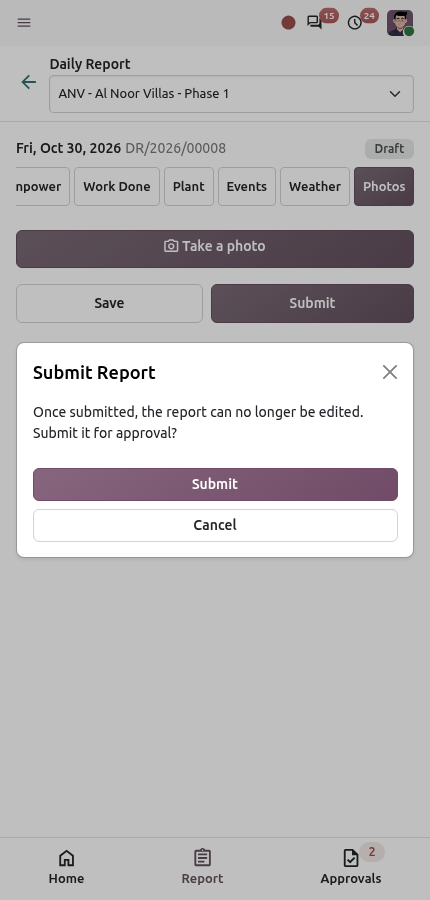
The confirmation window shown when you tap Submit. After you confirm, the report is saved and submitted, the message Report submitted for approval. appears and the app returns to the home screen. The site manager then approves it, from the office screen (see Submit and approve).
NO NETWORK? NOTHING IS LOST
Every change you make is also kept on the phone until it is saved. If you leave the screen without saving (or the network drops), the next time you open the report a yellow banner says Unsent changes were kept on this phone. Tap Restore to get them back, then Save; or tap Discard to forget them.
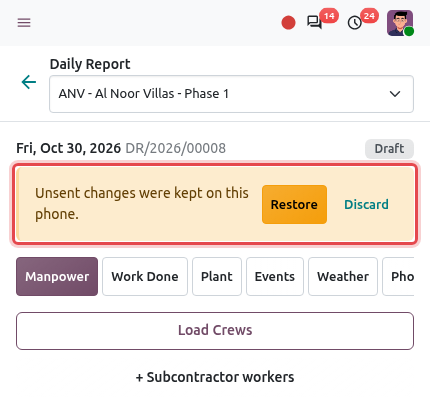
Crew Attendance
The foreman records who is on site. The check-in and check-out times become attendances (Attendances app), and Load Crews then uses them as the hours worked in the daily report.
Tap Crew Attendance. The crews of the project are listed with their members; the foreman is marked (foreman). Workers already checked in show a green In 07:02 badge.
Tick the workers who arrived (tap Select all on a crew to tick the whole crew), then tap Check In. In the evening, tick them again and tap Check Out. If the phone allows it, the position of the phone is recorded with the attendance.
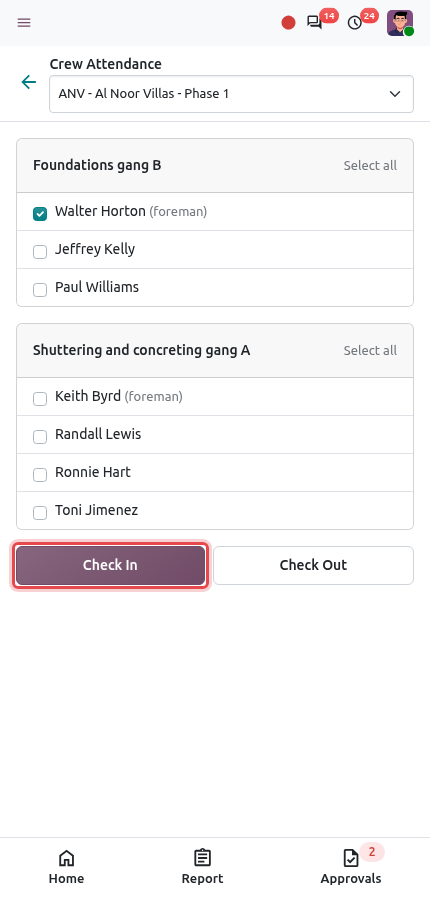
Walter Horton is ticked; Check In is framed.
Materials
Tap Materials. The material requests of the project are listed with their stage and, for each material, the quantity delivered to site out of the quantity requested (for example 120 / 120 kg).
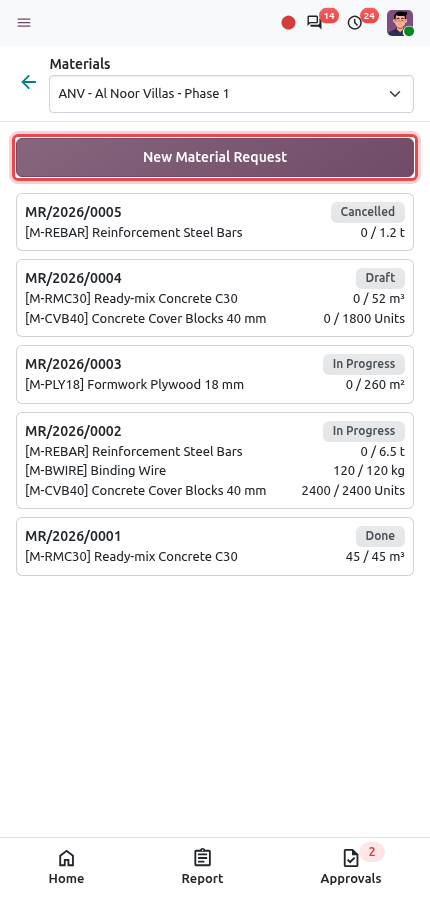
The material requests of the project. Tap New Material Request. Type a few letters of the material (name or code) and tap it in the list.
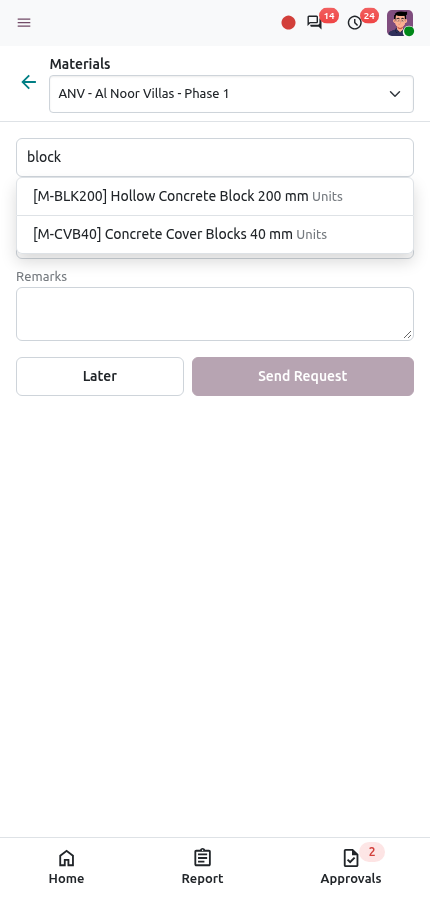
Searching "block". Type the quantity next to each material (tap × to remove one). Add more materials the same way. Choose the date in Required on and write any Remarks (delivery instructions). Tap Send Request, or Later to drop it.
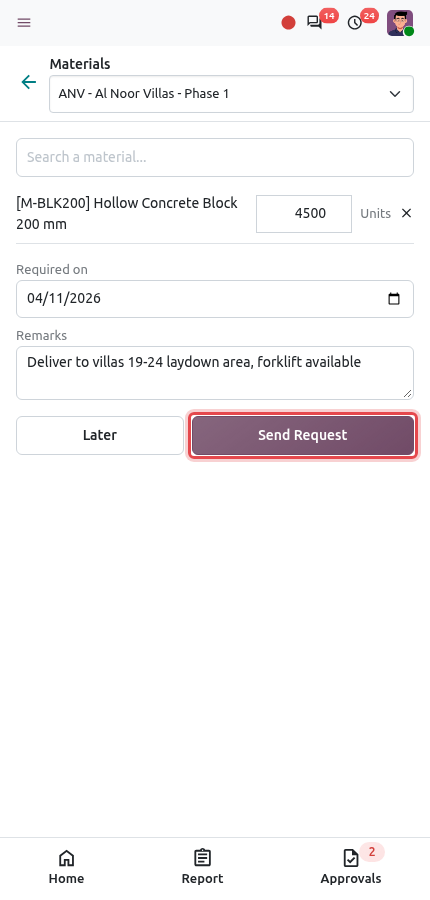
4,500 blocks required on 4 November.
The request is created in the back office as a draft Material Request, with the source, vendor and cost code proposed automatically. If an approval rule exists for material requests, it is sent for approval at once. The procurement team then turns it into purchases or transfers.
Receive Goods
When a purchase of the project is confirmed, its delivery is expected at the site store. The storekeeper receives it from the phone.
Tap Receive Goods. The deliveries expected at the site store are listed, with the vendor and the number of lines.
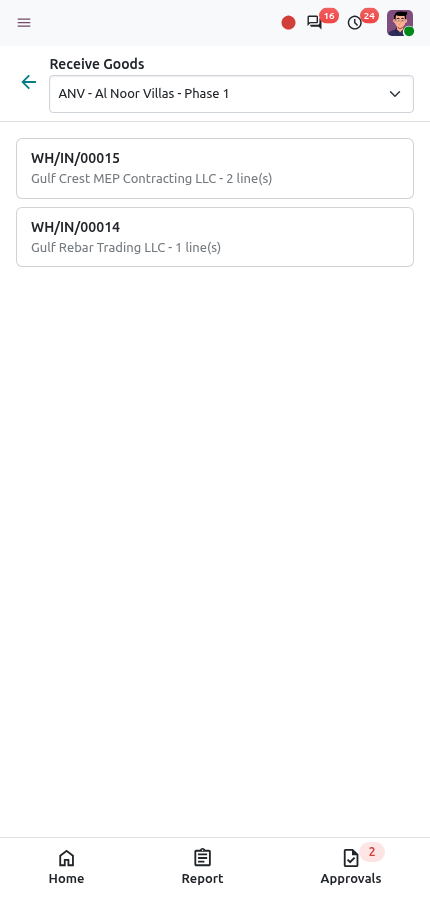
Two deliveries expected at the site. Tap the delivery that arrived. Each line shows the quantity ordered. Correct the quantity if less was delivered, then tap Receive.
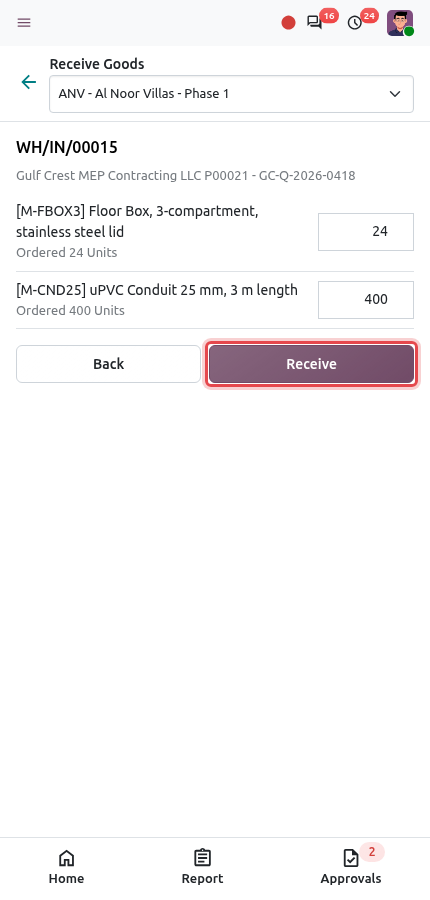
Count what arrived, then tap Receive (framed).
PARTIAL DELIVERY
If you receive less than ordered, the rest is not kept as a backorder: the receipt is closed with what you counted. Tell the procurement team so that they follow up the missing quantity. Products tracked by lot or serial number must be received from the back office.
Plant Log
Tap Plant Log. The plant mobilised on the project is listed with its hour meter, and the recent logs below.
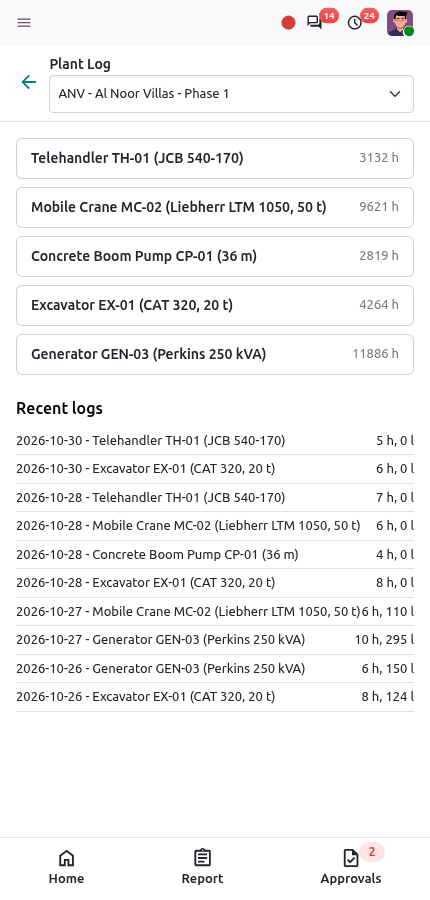
The plant on site and the latest logs. Tap a machine. Type the Hours worked, Hours idle, Breakdown hours, the Fuel (l) filled in, the Hour meter reading and a remark. Tap Save Log.
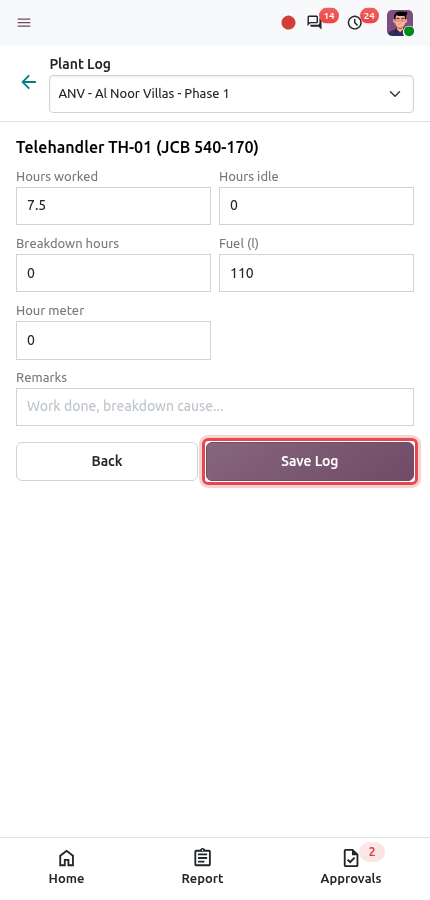
7.5 hours worked and 110 litres of fuel.
The log is saved for today and confirmed at once: the hour meter moves, owned plant is charged to the project, and breakdown hours open a maintenance request (see Plant Logs).
ONE LOG PER MACHINE AND DAY
If the machine is also in the Plant section of the daily report, do not log it here as well: the approved report creates its own plant log, and the hours would be counted twice.
Approvals
Tap Approvals (tile or bottom bar). The documents waiting for your decision are listed, from all projects: contracts, variations, certificates, material requests... with the amount, the project, who asked and the approval step.
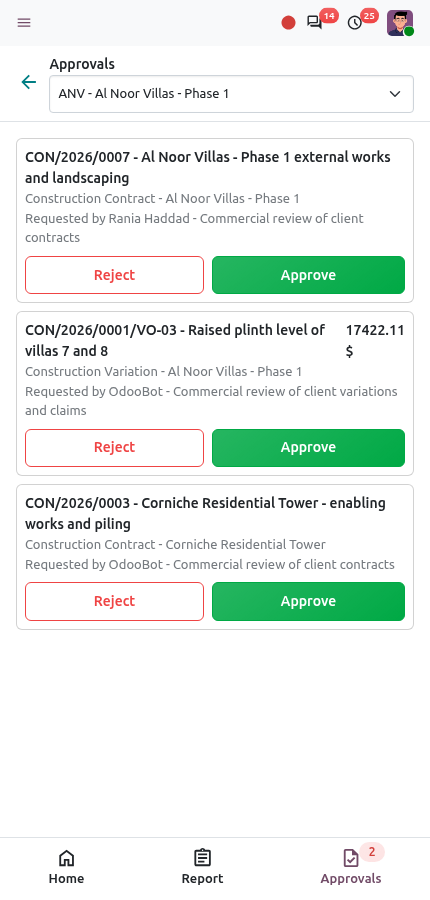
Documents waiting for approval. Tap Approve to approve. To refuse, tap Reject, type the reason of the rejection and tap the red Reject button. The person who asked is informed.
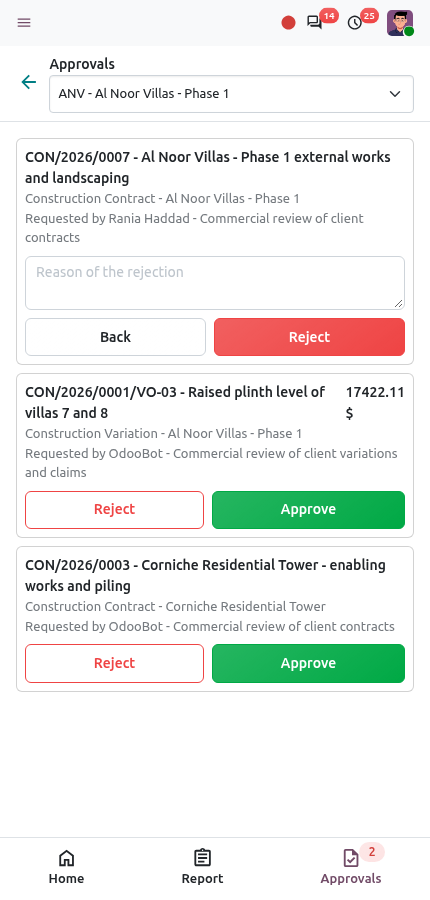
A rejection always needs a reason.
RFIs
An RFI (Request For Information) is a question to the designer or consultant when a drawing is unclear or two drawings disagree. See Documents for the office side.
Tap RFIs. The RFIs of the project are listed with their stage and due date; an overdue RFI has a red badge. Tap an RFI to read the question and the answer.
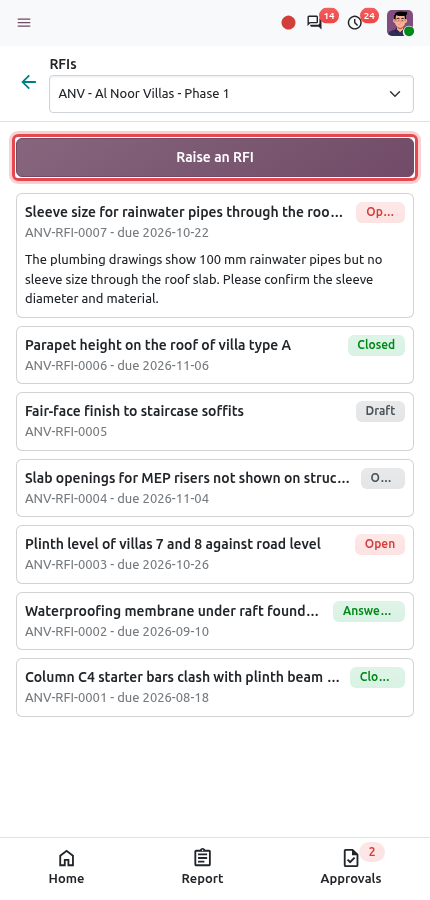
The list of RFIs; Raise an RFI is framed. Tap Raise an RFI. Type the Subject, the Question (what is unclear, where, and what you propose), the Location and the Discipline. Tap Add a photo to attach pictures. Tap Raise RFI: the RFI is created and submitted.
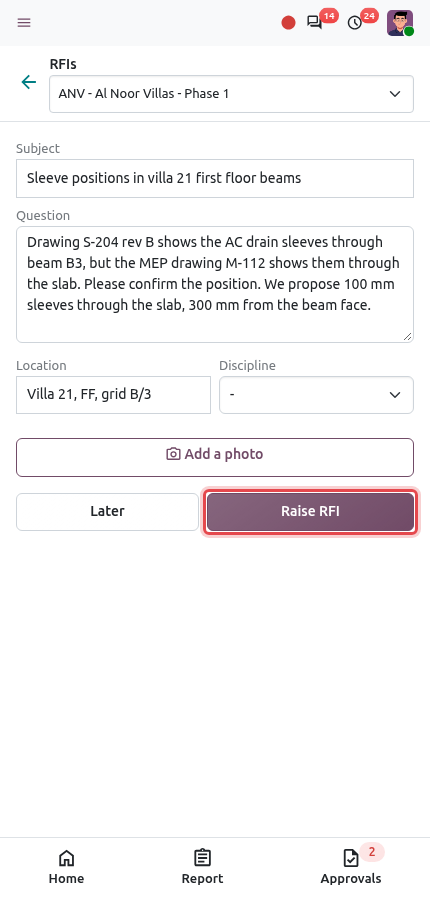
A new RFI about sleeve positions.
Inspections
The QA/QC inspector answers the inspection requests (for example "before concreting") on the spot. See Quality for how they are requested.
Tap Inspections. The inspections of the project are listed; the ones waiting show To inspect, the others their result (A, B or C).
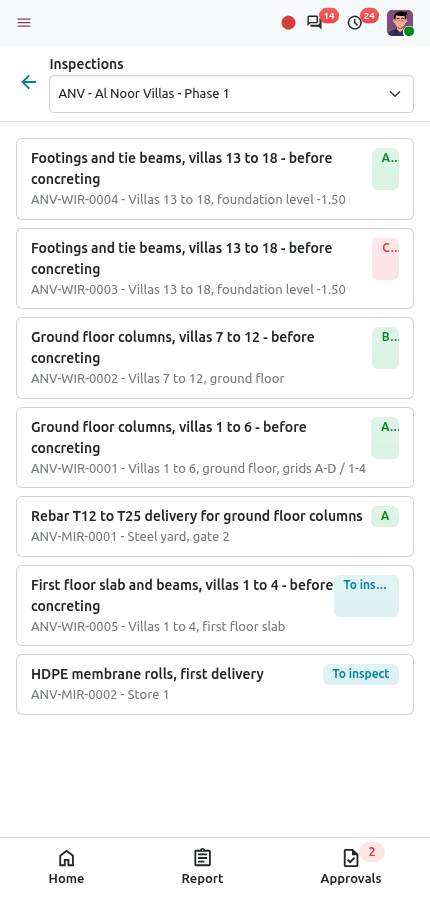
Inspections of the project. Tap an inspection To inspect. For each checklist item tap Pass, Fail or N/A and type the measurement or a remark. A Hold point badge means work must not continue before the inspection.
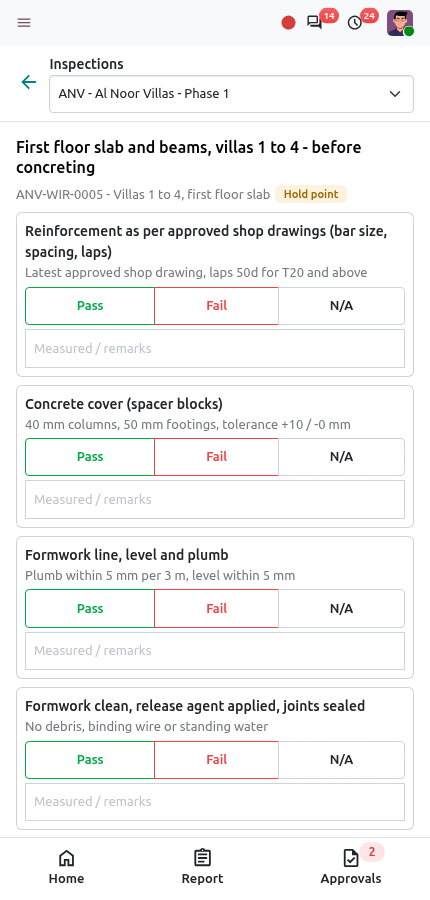
The checklist of a hold-point inspection. At the bottom, write the Remarks and tap the result: A (approved), B (approved with comments) or C (rejected, re-inspect).
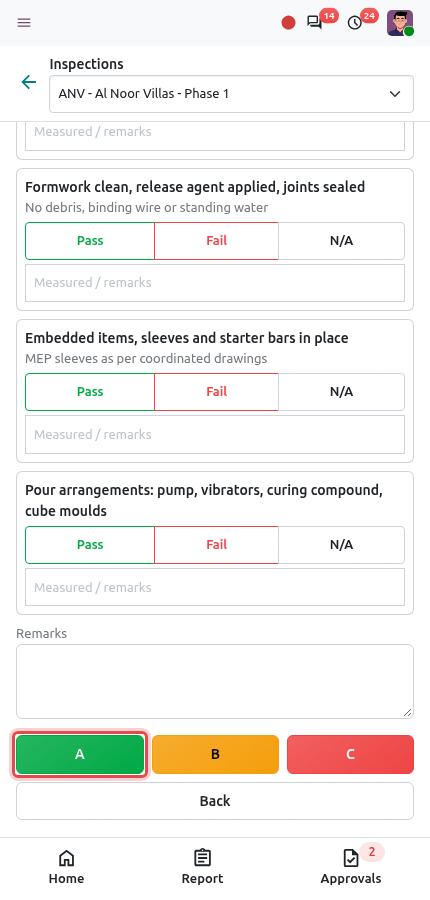
The result buttons A, B and C.
RULES OF THE RESULT
Every checklist item must be answered. An inspection with a failed item cannot get A. Results B and C need remarks.
Snags
A snag is a small defect to fix before handover (a chipped edge, a paint touch-up...).
Tap Snags. The open snags are listed with their photo and the subcontractor responsible.
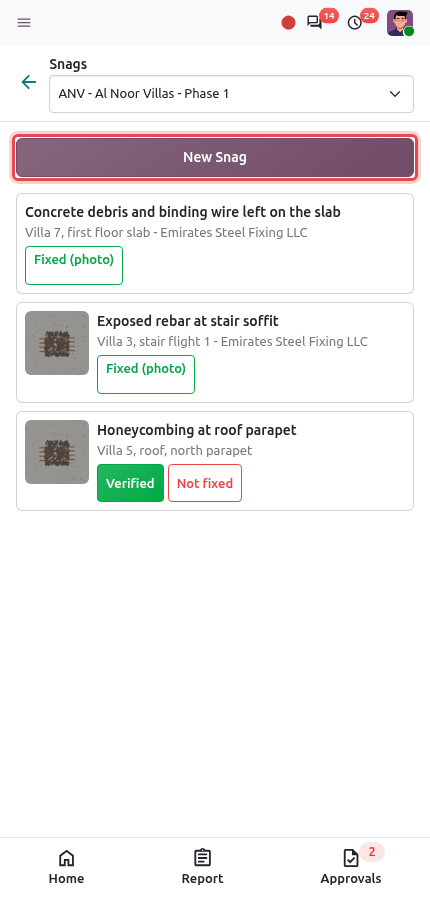
Open snags. New Snag is framed. Tap New Snag, describe the Snag and its Location, tap Take a photo, then Record Snag.
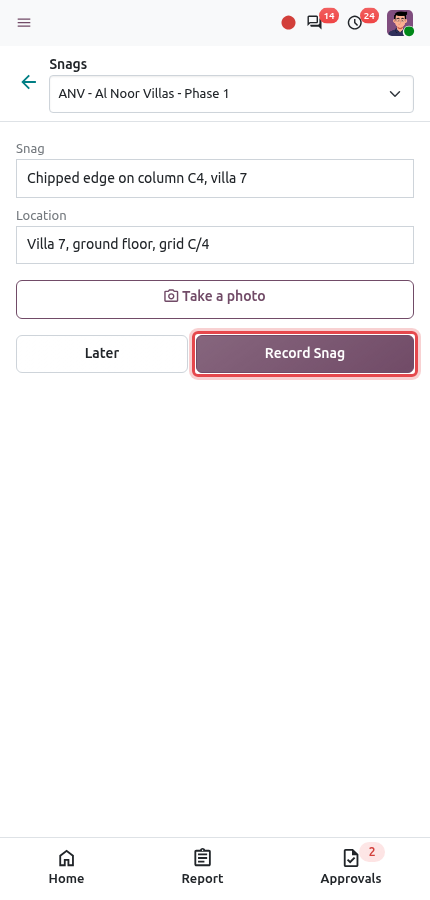
Recording a new snag. When the snag is repaired, tap Fixed (photo) and take a photo of the repair. The inspector then taps Verified, or Not fixed to reopen it.
NCRs
An NCR (Non-Conformance Report) records work or material that does not meet the specification and needs a corrective action.
Tap NCRs. The open NCRs are listed with their severity; an overdue one is shown in red.
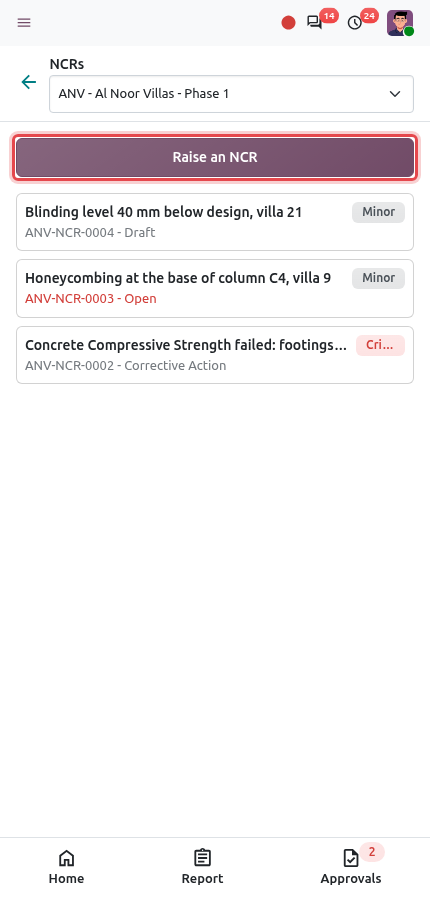
Open NCRs of the project. Tap Raise an NCR. Type the Title, What does not conform?, the Location and the Severity (Minor, Major, Critical). Add photos, then tap Raise NCR.
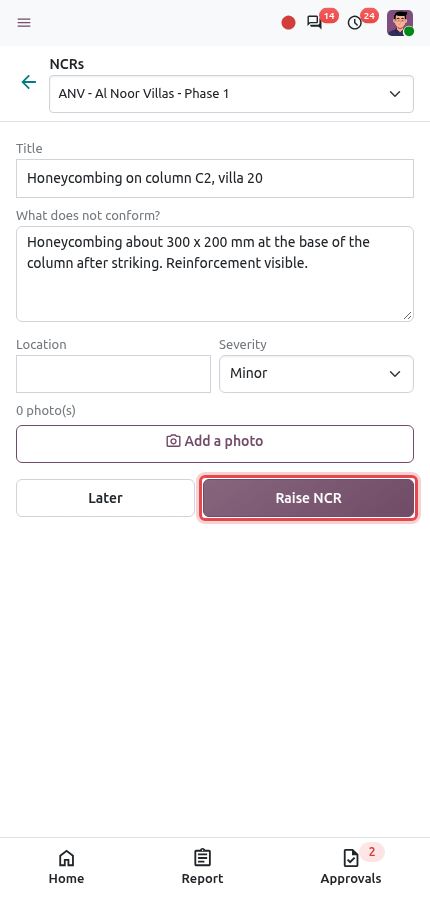
Raising an NCR for honeycombing on a column.
Safety: observations, incidents and permits
Safety Observation
Tap Safety Observation. Choose Unsafe Act, Unsafe Condition or Positive (good practice), the Category and, for unsafe ones, the risk (Low, Medium, High).
Describe What did you see?, the Location, take a photo, and tap Record Observation.
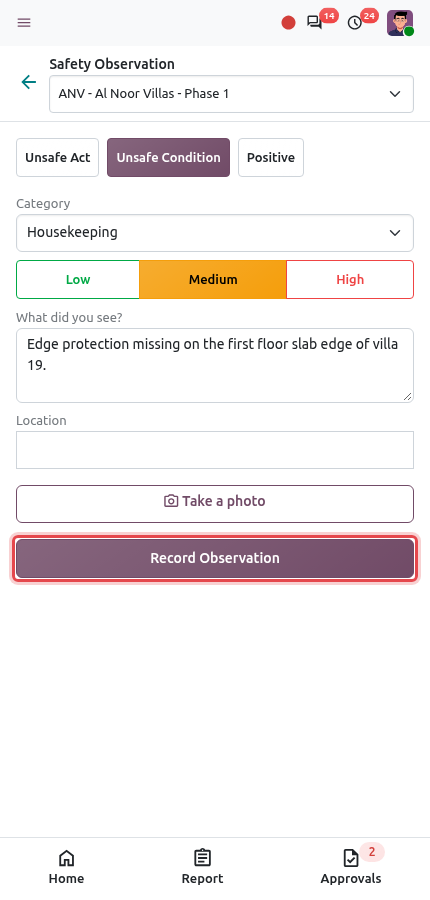
An unsafe condition: missing edge protection.
Report Incident
EMERGENCY FIRST
In an emergency, call for help first. Report in the app only once the area is safe.
Tap Report Incident. Choose the Type (for example Near Miss, Injury). For an injury, also choose the Injury severity and type the Injured person.
Type a Title, What happened? and the Location, add photos and tap Report Incident. The HSE team is alerted at once.
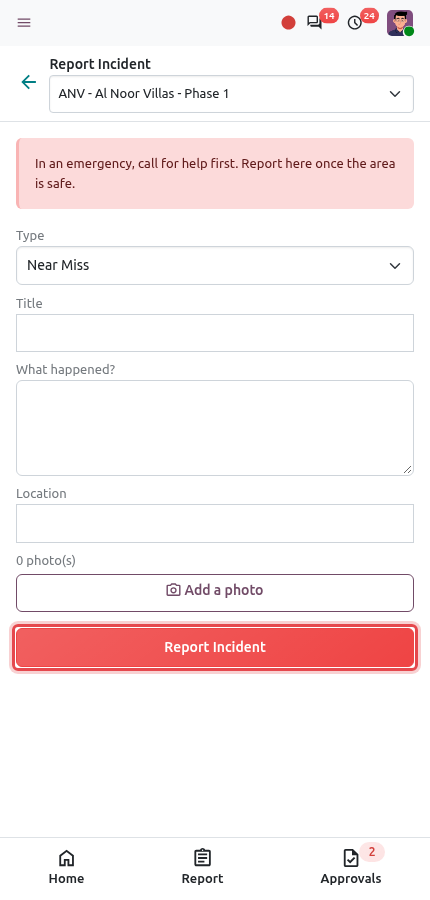
The incident form.
Permits to Work
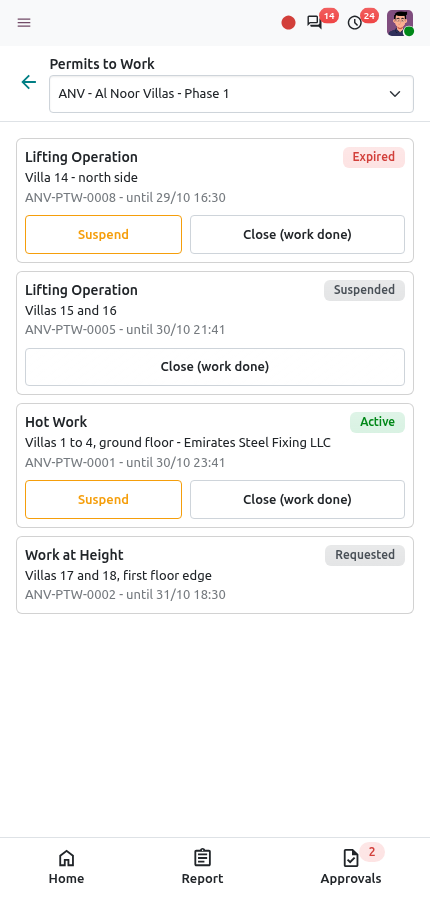
Tap Permits to Work to see the permits of the project (hot work, work at height, lifting...): their location, contractor, validity and stage. An expired permit has a red Expired badge. On an active permit, tap Suspend to stop the work (for example high wind during a lift), or Close (work done) when the work is finished. Permits are requested and issued from the office (see HSE).